Guides

76 worked scenarios

Each one states the situation, how to recognise it, which product and workspace cover it, the procedure and the reason for each step, the exact commands, the options that apply and when, best practice, and what the product will not do.

8 scenarios

Everyday file loss

One computer, one card, one phone. Deletion, formatting and media that has stopped presenting its files.

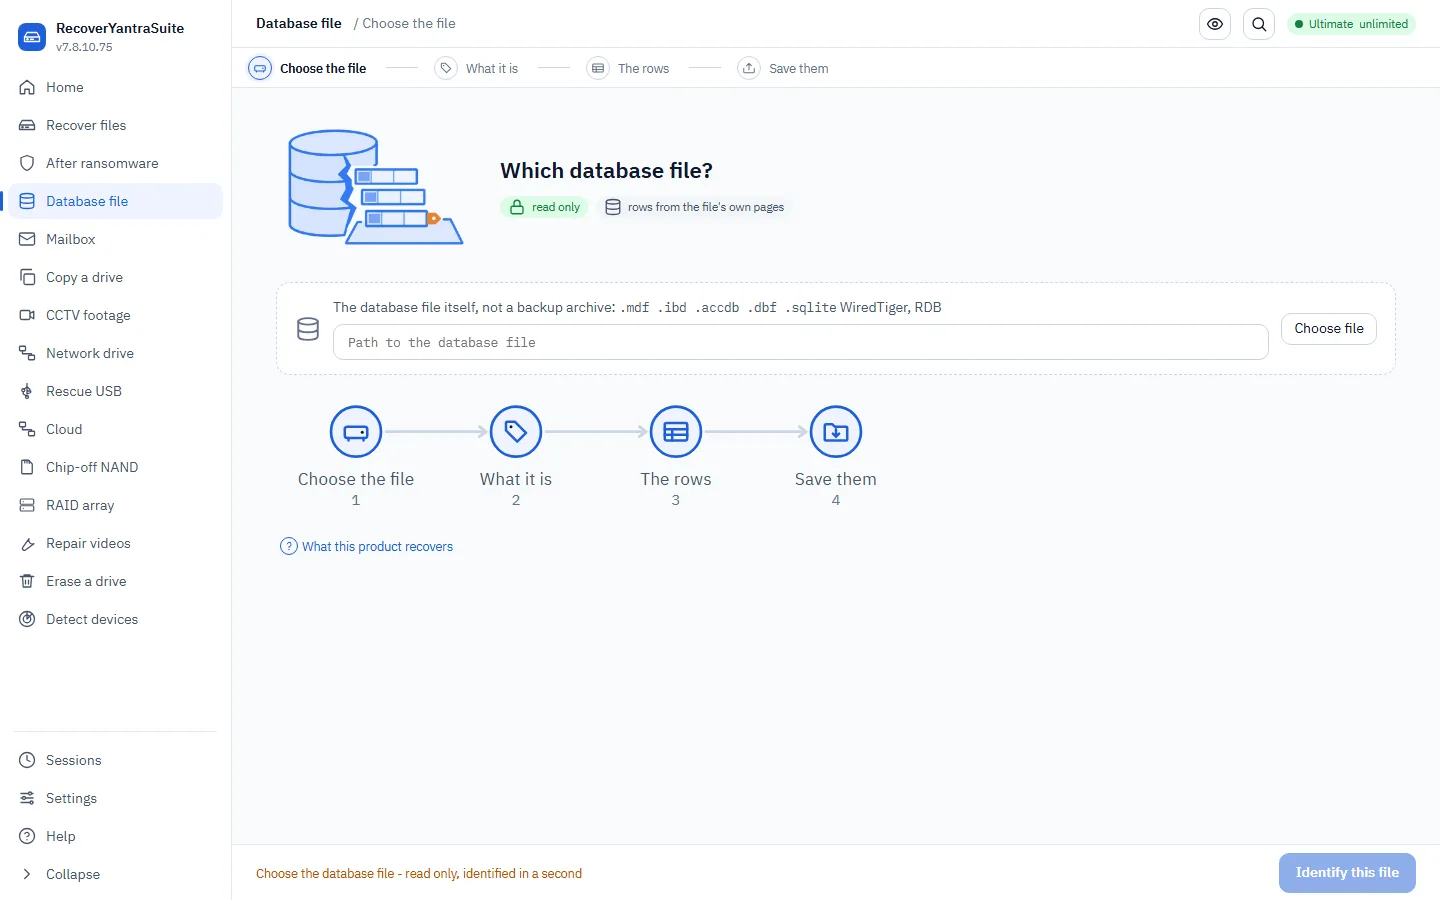
Choosing what to look for, in plain language

Files deleted and the Recycle Bin emptied

RecoverYantraSuiteRecover files from disks, cards and imagesIn the app

Files were deleted and the Recycle Bin emptied before anybody noticed they mattered. The volume is otherwise healthy and still in use, which is the part that decides the outcome.

How to recognise it

  • The file is not in the Recycle Bin
  • The volume mounts normally and other files open
  • The machine has been used since the deletion

Procedure

  1. Stop using the drive holding the deleted filesDeleting a file releases its space. Anything written afterwards can land on it, and once that happens no tool recovers the contents.
  2. If the files are on the system drive, shut the machine down and read the disk from another machine, or work from an imageWindows writes to the system drive continuously, so a recovery run on the live system drive is racing the operating system.
  3. Scan in smart mode and review before exportingSmart mode parses the file system for original names and folders and carves free space for what the metadata no longer covers.

Commands

recoveryantra recover --device \\.\PhysicalDrive1 -o D:\Recovered

The straightforward case: a healthy second drive, recovered to separate storage.

recoveryantra recover --image case.dd -o D:\Recovered --resume

Continue an overnight scan of a large drive without starting again.

Options, and when to use them

--modeLeave at smart. fs alone misses anything the file system no longer indexes, which is usually exactly what was deleted.
--include-intactAdd only if you also want the files that are still present. For a plain deletion the default is what you want.
--reportAdd when somebody other than you needs the result.

Best practice

  • Recover to a different physical drive, never to the source
  • Preview before exporting: the preview shows whether the file is whole
  • Where the volume is NTFS and the deletion is recent, expect original names and folder structure to survive

What this will not do

  • A file whose space has been reused is gone, and is reported as such rather than written out in a broken state
  • On an SSD, TRIM usually clears deleted data within minutes. The product detects this and says so rather than running a scan that cannot succeed

Hit one of these limits? The situation chooser names the product or the method that gets past each one, case by case.

A memory card reports that it needs to be formatted

RecoverYantraSuiteRecover files from disks, cards and imagesIn the app

A camera, phone or card reader reports that the card must be formatted before it can be used. This usually means the file system header is damaged, not that the photographs are gone.

How to recognise it

  • Windows offers to format the card every time it is inserted
  • The camera reports a card error
  • The card's capacity shows correctly, or shows as 0 bytes

Procedure

  1. Do not accept the format promptFormatting writes a new file system over the old one. The photographs usually survive it, but the names and folders often do not.
  2. Copy the card to an image first if it is failing or valuableA card that is producing read errors should be read once, not repeatedly.
  3. Scan the card or the image in smart modeThe file system header may be damaged while its backup copy is intact, in which case names and folders come back too.

Commands

recoveryantra recover --device \\.\PhysicalDrive2 -o D:\CardRecovery

Read the card directly when it is healthy.

recoveryantra image --device \\.\PhysicalDrive2 -o D:\card.dd --retries 1

Image a card that is producing errors, with a low retry count.

recoveryantra recover --image D:\card.dd -o D:\CardRecovery --include-intact

Recover everything from the image, present and deleted.

Options, and when to use them

--include-intactAdd it here. After a format the files were never deleted, so the deleted-only default will look almost empty.
--retriesLower it to 0 or 1 on a card that is deteriorating; each retry is another read of failing flash.
--modesmart. Card file systems keep a backup boot sector, which the product will fall back to automatically.

Best practice

  • Work from an image for anything irreplaceable
  • Check the recovered photographs open before telling the customer the job is done
  • Keep the card until the customer has confirmed the result

What this will not do

  • A card that is not detected at all by the operating system is a hardware fault, not a software case
  • Photographs the camera overwrote in normal use are gone

Hit one of these limits? The situation chooser names the product or the method that gets past each one, case by case.

A phone was reset and the photographs were not backed up

RecoverYantra MobilePhone acquisition and data recoveryIn the app

A handset was reset, or an application was removed, and photographs or messages that were never backed up are wanted. What is possible depends almost entirely on the handset and whether it is rooted.

How to recognise it

  • The handset works normally but the content is gone
  • There is no cloud backup, or the backup predates the loss
  • There may be an old computer backup

Procedure

  1. Establish what this specific handset allows before promising anythingA modern handset encrypts storage, so deleted data is not recoverable by reading the device unless it is rooted.
  2. Check for an existing computer backup firstAn iTunes or Finder backup, or an Android backup, is frequently the complete answer and takes minutes.
  3. Copy what the handset does exposePhotographs still present can be copied off directly, read-only.

Commands

recoveryantra phone --areas

List what is recoverable per application, including what is honestly not recoverable locally.

recoveryantra phone --types

The same question by data type: contacts, messages, photographs.

recoveryantra recover --ios-backup "C:\Users\me\Apple\MobileSync\Backup\xxxx" -o D:\PhoneRecovery

Recover from an existing iOS backup folder.

recoveryantra phone --store msgstore.db --deleted-only

Recover deleted messages from a database already pulled off.

Options, and when to use them

--areasRun first when scoping, so the quote matches what is actually possible on that handset.
--deleted-onlyUse when the live data is already available and only the deleted records are wanted.
--keyRequired for an encrypted store such as WhatsApp. Without the key file the store cannot be read at all.

Best practice

  • Scope with --areas before quoting, not after
  • Prefer an existing backup over touching the handset
  • Record consent for the handset in writing

What this will not do

  • A locked handset cannot be read. It must be unlocked and must trust the computer
  • On an unrooted modern handset, deleted photographs are not recoverable by any software
  • Applications listed as not locally recoverable are ephemeral or server-side

Hit one of these limits? The situation chooser names the product or the method that gets past each one, case by case.

A USB stick or external drive shows as RAW

RecoverYantraSuiteRecover files from disks, cards and imagesIn the app

The drive appears in Windows but the volume has no recognised file system, so Windows reports it as RAW and offers to format it.

How to recognise it

  • Properties show 0 bytes used and 0 bytes free
  • Windows prompts to format on every connection
  • The drive letter appears but opening it fails

Procedure

  1. Do not formatThe prompt means Windows cannot read the volume header. It is not a statement that the drive is empty.
  2. Run a triage firstIt reports whether the drive is healthy or failing, which decides between reading it directly and imaging it.
  3. Scan with intact files includedNothing was deleted here. The volume cannot be mounted, so the deleted-only default would return almost nothing.

Commands

recoveryantra list --triage

Check the drive's health and how it is connected.

recoveryantra recover --device \\.\PhysicalDrive2 -o D:\Out --include-intact

Recover the whole volume, not only deleted files.

Options, and when to use them

--include-intactRequired for this case. Without it the result looks almost empty and the customer concludes nothing survived.
--modesmart. The file system may be recoverable from its backup copy, which returns names and folders.
--sector-sizeChange from 512 only for a 4K-native drive, where leaving it wrong prevents the volume being found at all.

Best practice

  • Always run triage before deciding how to read the drive
  • If the drive is clicking or the triage reports it is unhealthy, image it before anything else

What this will not do

  • A drive that does not appear at all is a hardware fault
  • If the volume was overwritten by a new file system and then used, the overwritten regions are gone

Hit one of these limits? The situation chooser names the product or the method that gets past each one, case by case.

Windows was reinstalled over the data

RecoverYantraSuiteRecover files from disks, cards and imagesIn the app

A machine was reinstalled or reset and the previous user's documents were not moved off first. Some of the old data is usually still in the space the new installation has not yet used.

How to recognise it

  • The machine works and has a fresh Windows installation
  • The old user profile is not present
  • The drive is the same physical disk

Procedure

  1. Stop using the machine immediatelyA fresh Windows installation writes continuously. Every hour of use reduces what is left.
  2. Read the disk from another machineRecovering the system drive while Windows runs on it is racing the operating system for the same free space. Take the disk out, or image it from a second machine.
  3. Scan in smart mode to a separate driveDocuments and photographs carve well even when the old file system has been replaced.

Commands

recoveryantra image --device \\.\PhysicalDrive0 -o E:\old-system.dd --retries 1

Image the old disk once from a second machine, then work from the image.

recoveryantra recover --image E:\old-system.dd -o E:\Recovered --include-intact

Recover everything the reinstall has not yet overwritten.

Options, and when to use them

--include-intactAdd it. The old files were not deleted; their file system entries were replaced.
--modesmart, then carve if the first pass returns little. A replaced file system means names are often gone but content is not.
--workersLeave at 0 so the carve uses the available cores.

Best practice

  • Never recover onto the drive being read
  • Set expectations before starting: a reinstalled drive is a partial recovery, not a complete one
  • Prioritise the file types the customer actually named

What this will not do

  • Anything the new installation has written over is gone
  • Original folder structure is usually lost when the file system is replaced; files come back by type

Hit one of these limits? The situation chooser names the product or the method that gets past each one, case by case.

An external drive was dropped and is now clicking

RecoverYantraSuiteImage a failing driveIn the app

A drive has suffered physical trauma and is making mechanical noise. This is the case where using the wrong approach destroys the data permanently.

How to recognise it

  • An audible repeated click or a grinding noise
  • The drive appears and disappears in the operating system
  • Reads succeed briefly and then stop

Procedure

  1. Power the drive down and stop tryingA clicking drive is a head or actuator fault. Every additional power cycle risks the heads contacting the platter.
  2. Do not run a recovery scan against itA scan reads the whole surface. On a mechanically failing drive that is the read that finishes it.
  3. Send it to a cleanroomThis is not a software case, and the product will say so.

Commands

recoveryantra list --triage

Confirms the condition and the device class. Keep it brief.

recoveryantra image --device \\.\PhysicalDrive2 -o D:\drive.dd --retries 0

ONLY if the drive is reading and the decision has been taken to attempt a single gentle pass. Not for a clicking drive.

Options, and when to use them

--retries0 or 1 for a deteriorating drive. High retry counts on a failing surface cost you the areas not yet reached.
--formatraw for speed on a marginal drive; convert to E01 later from the image if the matter needs it.

Best practice

  • Recognise a mechanical fault and stop, rather than proving it with one more attempt
  • If imaging is attempted at all, image once, with retries low, and work from the image afterwards

What this will not do

  • No software opens a physically failed drive. A drive that will not spin, or is not detected, needs a cleanroom and donor parts
  • Imaging a drive with a head fault can turn a case that could be recovered into one that no longer can be

Hit one of these limits? The situation chooser names the product or the method that gets past each one, case by case.

Deleted messages are needed from an Android handset

RecoverYantra MobilePhone acquisition and data recoveryIn the app

Messages, call history or contacts have been deleted from an Android handset and are needed back. Whether this is possible depends on whether the database can be reached.

How to recognise it

  • The handset works and is unlocked
  • The messages are not in any backup
  • The handset may or may not be rooted

Procedure

  1. Establish what can be reached on this handsetWithout root, only what the handset exposes can be copied. With root, the databases themselves can be read.
  2. Read the message database, including deleted rowsA deleted row frequently survives in the database's free space or in its write-ahead log.
  3. Report recovered deleted records as recovered deleted recordsThey are flagged as such, and the flag must survive into whatever is handed over.

Commands

recoveryantra phone --areas

What is reachable on this handset.

recoveryantra phone --store mmssms.db --deleted-only

Recover only the deleted rows from the SMS database.

recoveryantra phone --deep D:\PulledPhone

Mine a whole pulled phone folder for deleted material.

Options, and when to use them

--deepUse when deleted material matters and you have a full pulled folder. It takes considerably longer than reading one store.
--appForce the profile if auto-detection picks the wrong one.
--keyRequired for WhatsApp and other encrypted stores.

Best practice

  • Take a copy of the databases and work from the copy
  • Keep the deleted flag on every record through to the export
  • Record who authorised access to the handset

What this will not do

  • A locked handset cannot be read at all
  • Where the database has been vacuumed, deleted rows are genuinely gone
  • Some applications are ephemeral or server-side and are not recoverable locally; those are named rather than attempted

Hit one of these limits? The situation chooser names the product or the method that gets past each one, case by case.

Also covered by SakshyaYantra Mobile

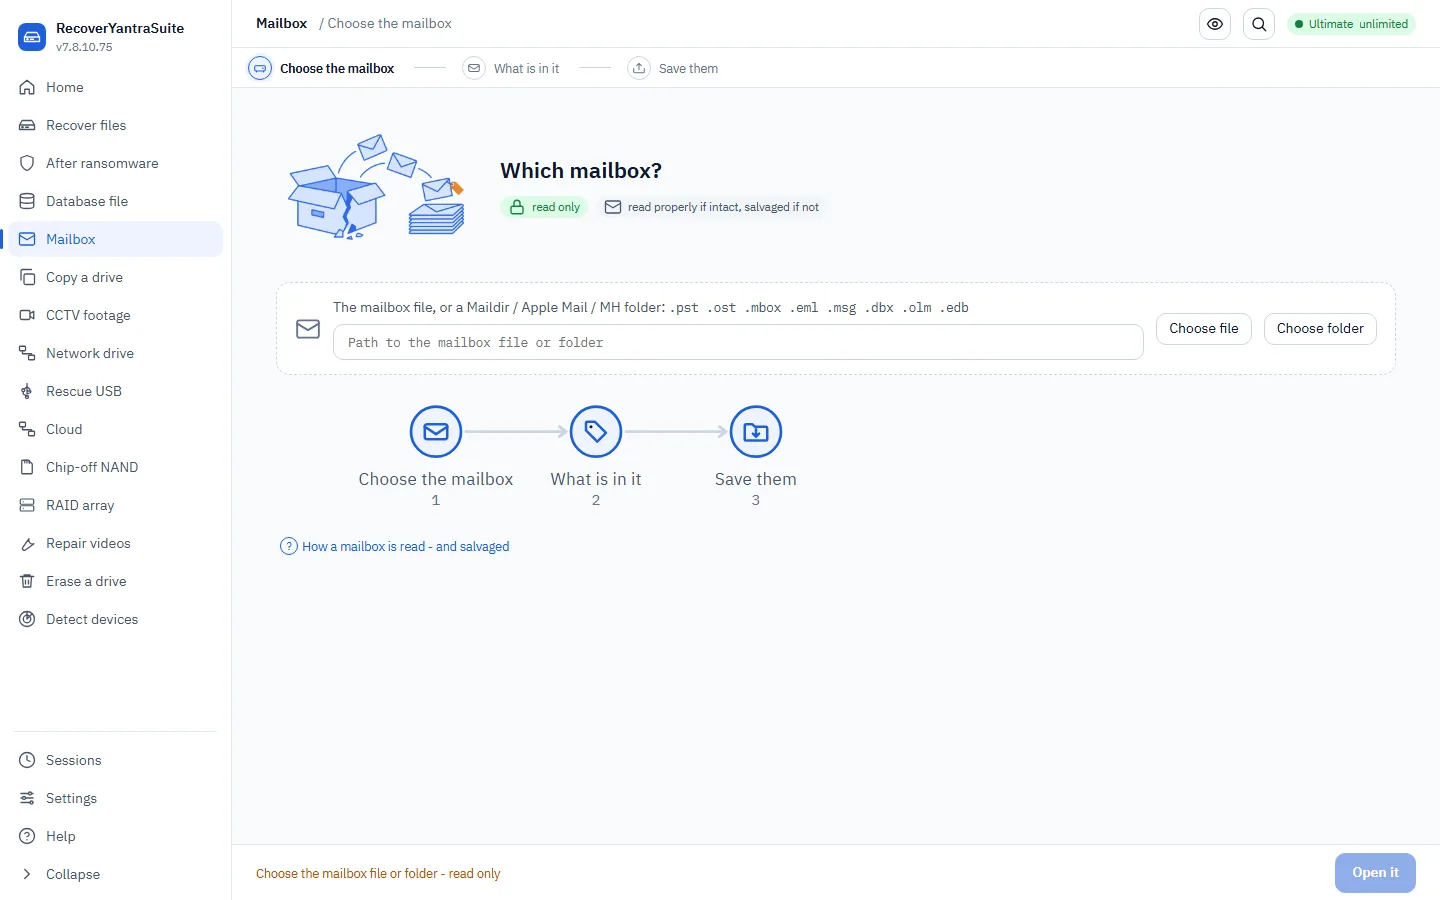
A drive already had CHKDSK (or another repair tool) run on it before recovery was tried

RecoverYantraSuiteRecover files from disks, cards and imagesIn the app

CHKDSK can rewrite a volume's index into something that still looks like a real, working filesystem - it stops asking to be formatted - while the fields inside it now point at the wrong place. Reading it as it stands now names almost nothing; the volume's own untouched spare copy of that index is consulted automatically whenever that happens, the same way it already is when the index is gone entirely.

How to recognise it

  • The drive mounts normally and reports the right size, not RAW
  • Folders that used to hold files are now empty, or the whole drive looks empty
  • CHKDSK (run by Windows automatically, or by the customer) said it fixed something

Procedure

  1. Do not run CHKDSK, or any other repair tool, againEach run writes to the very structures a spare-copy recovery reads from; a second run can overwrite the untouched copy as well.
  2. Recover in fs or smart mode, including intact filesThe primary index is read first; if it names essentially nothing, the volume's own spare copy is tried next, automatically, before anything is reported back.
  3. Read the recovery's own note about which copy was usedWhen the spare copy was needed, the result says so plainly, together with anything CHKDSK itself had already saved into FOUND.000-style folders.

Commands

recoveryantra recover --device \\.\PhysicalDrive2 -o D:\Recovered --mode fs --include-intact

Read the volume as it stands now; the spare index is tried automatically if the primary comes back essentially empty.

recoveryantra recover --device \\.\PhysicalDrive2 -o D:\Recovered --mode smart --include-intact

Also carve by content for anything neither copy of the index reaches.

Options, and when to use them

--include-intactRequired: CHKDSK's aftermath is not a deletion, the customer's own live files need reading back too.
--modefs reads only the index (fast, includes the automatic spare-copy fallback); smart adds carving over the same region.

Best practice

  • Never word this as the customer's mistake - they tried the obvious thing before calling, which is what most customers arriving here have done
  • Say plainly which copy of the index was actually used
  • Point out any FOUND.000\FILEnnnn.CHK fragments CHKDSK itself already produced, rather than leaving them unexplained in the results

What this will not do

  • A spare copy of the INDEX only restores names and folders; file data genuinely overwritten since CHKDSK ran is not recovered by it
  • A volume that legitimately holds very little is left alone - the fallback only runs when a known, valid filesystem names essentially nothing, not merely a small number of files

Hit one of these limits? The situation chooser names the product or the method that gets past each one, case by case.

9 scenarios

Servers, arrays and virtual infrastructure

Storage that a business runs on: RAID sets, NAS units, storage pools, virtual machine disks and machines that cannot be dismantled.

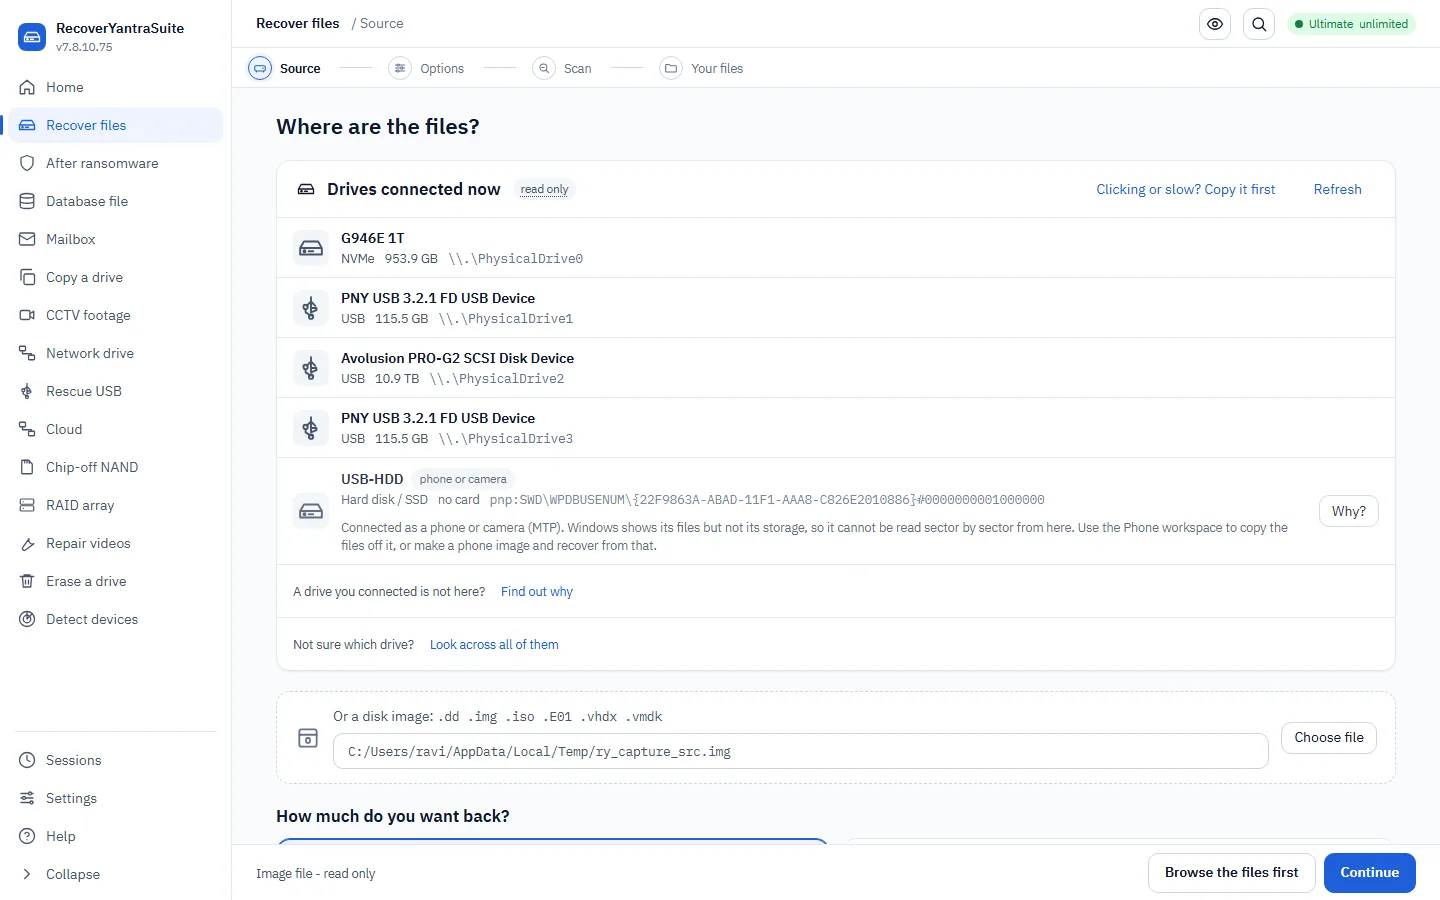
The source step: one card per connected drive

A RAID 5 array dropped a disk and the controller will not rebuild

RecoverYantraSuiteRecover files from disks, cards and imagesIn the app

An array has lost a member and the controller either refuses to rebuild or failed part way through. The data is still spread across the surviving members and can be assembled in software.

How to recognise it

  • The controller reports the array as failed or offline
  • A rebuild started and stopped, or was never offered
  • The volume no longer mounts on the host

Procedure

  1. Stop the controller from rebuilding againA second rebuild attempt onto a marginal disk is the most common way an array that could be rebuilt no longer can be.
  2. Image every surviving member before assembling anythingAssembly is read-only, but the members are usually the same age and the same model, so a second failure during the work is a real risk.
  3. Assemble from the member images and read the volumeGeometry is read from the members' own metadata where it survives.

Commands

recoveryantra image --device \\.\PhysicalDrive1 -o E:\raid\d1.dd --retries 2

Image each member in turn to the case store.

recoveryantra raid --members E:\raid\d1.dd E:\raid\d2.dd - E:\raid\d4.dd --auto -o E:\Out --include-intact

Assemble with the failed member marked absent and recover the volume.

recoveryantra raid --members E:\raid\d1.dd E:\raid\d2.dd - E:\raid\d4.dd --level 5 --chunk 65536 -o E:\Out --include-intact

State the geometry yourself when the metadata is gone.

Options, and when to use them

--autoTry first. It reads level, order and stripe size from the members, which removes the guesswork.
--membersOrder is what matters. A dash marks the missing member; a wrong order assembles a volume full of scrambled files.
--chunkThe value most often recorded wrongly in site documentation. If files open as garbage, this is the first suspect.
--include-intactRequired. Nothing here was deleted; the array stopped assembling.

Best practice

  • Image every member before touching the array
  • Label the images with the physical bay each disk came from
  • Verify by opening several recovered files of different types, not by the fact that a volume appeared

What this will not do

  • RAID 5 with two failed members cannot be reconstructed. RAID 6 tolerates two
  • A member that was rebuilt with wrong data before you arrived contributes wrong data to the assembly

Hit one of these limits? The situation chooser names the product or the method that gets past each one, case by case.

A NAS unit is offline and the data is in daily use

RecoverYantraSuiteRecover files from disks, cards and imagesIn the app

A NAS has stopped serving. The unit itself may have failed while the disks are fine, which is the common case and the recoverable one.

How to recognise it

  • The web interface does not respond or reports a degraded volume
  • Shares have disappeared from the network
  • The disks spin up normally when connected directly

Procedure

  1. Take the disks out and label the bay orderNAS units store the array layout on the disks, but bay order is the cheapest thing to record and the most annoying to reconstruct.
  2. Image each diskConsumer NAS disks are usually the same batch and the same age.
  3. Assemble the array and read the volumeSynology SHR, standard Linux md arrays and LVM volumes are read from their own metadata.

Commands

recoveryantra list --triage

Check each disk's health before imaging it.

recoveryantra image --device \\.\PhysicalDrive2 -o E:\nas\d1.dd

Image each NAS disk.

recoveryantra raid --members E:\nas\d1.dd E:\nas\d2.dd --auto -o E:\Out --include-intact

Assemble and recover. Auto covers SHR and Linux md layouts.

Options, and when to use them

--autoCorrect for almost every NAS. The layout is written on the disks by the unit itself.
--include-intactRequired: this is a whole-volume recovery.
--sector-sizeChange from 512 only for 4K-native disks.

Best practice

  • Record which bay each disk came from before removing any of them
  • Recover to storage that is not part of the NAS
  • If the unit is under warranty, image first and let the vendor have the hardware afterwards

What this will not do

  • An encrypted NAS volume needs its passphrase; without it the data is not readable
  • A NAS that wrote a new configuration over the old array may have destroyed the layout, and that is not always recoverable

Hit one of these limits? The situation chooser names the product or the method that gets past each one, case by case.

A file server volume reports as RAW after a power failure

RecoverYantraSuiteRecover files from disks, cards and imagesIn the app

Power was lost during writes and the volume no longer mounts. The file system metadata is damaged; the data usually is not.

How to recognise it

  • The volume shows as RAW in Disk Management
  • chkdsk offers to fix it, or refuses to run
  • The partition table still shows the right size

Procedure

  1. Do not run a repair utility yetA repair writes to the volume. If it goes wrong there is no second attempt, and the recovery becomes much harder.
  2. Image the volume firstThe image is what protects the option of trying something else.
  3. Recover from the image with intact files includedThe file system's backup copies are consulted automatically, which often returns names and folders intact.

Commands

recoveryantra image --device \\.\PhysicalDrive1 -o E:\server.dd --format e01

Image the volume to a compressed evidence image.

recoveryantra recover --image E:\server.dd -o E:\Out --include-intact --report

Recover everything and produce a report for the client.

Options, and when to use them

--include-intactRequired. Nothing was deleted.
--formate01 compresses well on a server volume with free space, and carries the acquisition metadata.
--reportThe client will want a list of what came back.

Best practice

  • Image before any repair attempt, without exception
  • Recover first, and only consider repairing the original afterwards
  • Check the recovered folder structure against what the client expects

What this will not do

  • Regions the power failure left half-written are damaged in the data as well as the metadata
  • A volume that was subsequently reformatted by an administrator loses the old metadata entirely

Hit one of these limits? The situation chooser names the product or the method that gets past each one, case by case.

A virtual machine disk is corrupt and the backup is too old

RecoverYantraSuiteRecover files from disks, cards and imagesIn the app

A VMware or Hyper-V virtual disk will not boot or will not attach, and the most recent usable backup predates work that matters.

How to recognise it

  • The hypervisor reports the disk as invalid or locked
  • The guest fails to boot after a snapshot operation
  • A -flat.vmdk or .vhdx file exists and is the expected size

Procedure

  1. Copy the virtual disk files off the datastoreWork from a copy. The datastore is live storage and the original should stay untouched.
  2. Open the virtual disk directly and read the guest file systemThe disk does not need to boot, or even attach, to have its contents read.
  3. Recover the files the business needs, not the whole guestA full guest restore is usually slower than extracting the data and putting it into a working machine.

Commands

recoveryantra recover --image E:\vm\server-flat.vmdk -o E:\Out --include-intact

Read the guest file system straight out of the virtual disk.

recoveryantra recover --image E:\vm\server.vhdx -o E:\Out --include-intact --report

The same for Hyper-V, with a report.

Options, and when to use them

--include-intactRequired. The guest's files were never deleted.
--modesmart. The guest file system is usually intact once the container can be read.
--reportUseful evidence for the change record.

Best practice

  • Copy the virtual disk off the datastore before starting
  • Where a snapshot chain exists, establish which link is the current one before reading any of them
  • Extract data rather than attempting to resurrect the guest, unless the guest itself is the deliverable

What this will not do

  • A split or snapshot chain with a missing link cannot be reassembled past the gap
  • An encrypted guest volume still needs its key

Hit one of these limits? The situation chooser names the product or the method that gets past each one, case by case.

A Storage Spaces pool will not come online

RecoverYantraSuiteRecover files from disks, cards and imagesIn the app

A Windows Storage Spaces pool reports as unhealthy and its virtual disk will not attach, so the data on it is unreachable through Windows.

How to recognise it

  • The pool shows a warning in Server Manager
  • The virtual disk is detached and will not reattach
  • The member disks are all present and readable

Procedure

  1. Image every member diskReassembly reads across all of them, and pool members are commonly the same age.
  2. Reassemble the virtual disk from the member imagesThe pool database describes how slabs are laid across the members.
  3. Recover from the reassembled volumeOnce assembled it reads as an ordinary NTFS or ReFS volume.

Commands

recoveryantra image --device \\.\PhysicalDrive3 -o E:\pool\m1.dd

Image each pool member.

recoveryantra recover --slabmap E:\pool\slabmap.json -o E:\Out --include-intact

Reassemble from the slab map and recover the volume.

Options, and when to use them

--slabmapThe route for a Storage Spaces virtual disk; a plain member image on its own is not a volume.
--include-intactRequired, as with any whole-volume recovery.

Best practice

  • Image all members before assembly
  • Keep the member images together with the slab map; one without the other is not usable
  • Confirm the assembled volume yields real files before reporting success

What this will not do

  • A pool missing more members than its resiliency tolerates cannot be reassembled
  • Parity layouts must be established correctly; the product builds the candidates and keeps the one that yields a real file system

Hit one of these limits? The situation chooser names the product or the method that gets past each one, case by case.

A drive must be read in a machine that cannot be dismantled

RecoverYantraSuiteImage a drive over the networkIn the app

The data is on a machine that cannot be opened: a laptop under warranty, a server that must not be taken apart, or a site nobody can attend today.

How to recognise it

  • The machine boots, or can be booted from external media
  • The drive cannot be removed for policy or warranty reasons
  • There is a network path between the two machines

Procedure

  1. Run the agent on the target machineIt serves the drive read-only across the network.
  2. Image the drive from the working machineThe image lands on your storage, and the recovery runs against it.
  3. Verify the image before releasing the machineA short image is reported as failed rather than handed over.

Commands

recoveryantra remote agent

Run on the machine holding the drive, so it can be read across the network.

recoveryantra remote list --host 10.0.4.30 --key <pairing-key>

See which drives that machine is offering.

recoveryantra remote image --host 10.0.4.30 --key <pairing-key> --disk <disk-as-listed> -o E:\remote.dd

Copy the drive across to local storage.

recoveryantra recover --image E:\remote.dd -o E:\Out --include-intact

Recover from the image once it has arrived.

Options, and when to use them

--include-intactUsually required, since the machine's files were not deleted.
--reportWorth producing when the machine is going back to somebody else.

Best practice

  • Verify the image length against the source before releasing the machine
  • Run the agent only on a network you control
  • Record the start and finish times: a large drive over a slow link is an overnight job

What this will not do

  • The transfer is only as reliable as the link, and a large drive over a slow network takes as long as it takes
  • A machine that will not boot at all needs rescue media or the disk removing after all

Hit one of these limits? The situation chooser names the product or the method that gets past each one, case by case.

Also covered by SakshyaYantra Enterprise

A CCTV recorder disk shows as unformatted in Windows

RecoverYantraSuiteCCTV and DVR footageIn the app

A disk taken out of a security recorder shows no readable file system in Windows, because recorders use their own layout rather than NTFS.

How to recognise it

  • Windows offers to format the disk
  • The recorder itself has failed or its export function does not work
  • The footage is needed for a specific date and time

Procedure

  1. Identify the recorder before extracting anythingIt reports which recorder wrote the disk, which tells you whether the format is supported and how long the job will take.
  2. Image the disk if the footage may be needed as evidenceRecorder disks are large, so plan the storage first.
  3. Extract clips, then reviewRecorders overwrite continuously, so the oldest footage present is the boundary of what exists.

Commands

recoveryantra cctv --device \\.\PhysicalDrive2 --identify-only -o E:\Clips

Establish which recorder wrote the disk, without extracting.

recoveryantra image --device \\.\PhysicalDrive2 -o E:\dvr.dd

Image the recorder disk first where the footage matters.

recoveryantra cctv --image E:\dvr.dd -o E:\Clips --min-clip 262144

Extract clips from the image, ignoring very short fragments.

Options, and when to use them

--identify-onlyAlways run first. It costs minutes and tells you whether the rest of the job is viable.
--min-clipRaise it when the sweep returns large numbers of very short fragments; lower it when the incident is only seconds long.
--max-clipsCap a sampling run on a very large recorder, and say in the notes that the run was capped.

Best practice

  • Power the recorder down before removing the disk; a running recorder overwrites the oldest footage continuously
  • Identify first, extract second
  • Note the recorder's clock setting: recorder time is frequently wrong and the timestamps inherit it

What this will not do

  • Clips are recovered by content, so per-clip channel and start time are not always available
  • Footage the recorder has already overwritten is gone
  • A clip whose parameter sets were lost may not play, and is marked as such rather than listed as normal

Hit one of these limits? The situation chooser names the product or the method that gets past each one, case by case.

Also covered by SakshyaYantra Enterprise

A customer needs one exact clip off an already-recovered recorder extraction, playable and with a still for the report

RecoverYantraSuiteCCTV and DVR footageIn the app

The clips are already extracted from a recorder disk, and one customer or insurer needs a single time range from a single camera - not the whole extraction, and not the raw carved file if a shorter, playable cut will do.

How to recognise it

  • The footage has already been through `cctv --device/--image -o`
  • A customer, insurer or the other side needs one clip, one range, or a still, not the full extraction
  • The clip has to remain trustworthy: the recorder's own bytes wherever possible, and said plainly when it is not

Procedure

  1. Read the recorder's own camera indexCameras against time, read in seconds, nothing written - confirms which camera and time range you actually need before touching a single clip file.
  2. Play the clip firstFrame count, keyframes, picture size and time base - the same check a forensic examination runs before handing anything over.
  3. Hand over the whole clip, or cut a shorter rangeA full clip is downloaded byte-exact; a range is remuxed losslessly by default, so the recorder's own compressed pictures are kept rather than re-encoded.
  4. Capture a still and write the reportA still frame for a claim form, and a written report covering every clip's channel, time, codec and hash.

Commands

recoveryantra cctv index E:\dvr.dd

See every camera and its time range before choosing a clip.

recoveryantra cctv play D:\Footage\clip_00000000.h264

Confirm the clip's own timeline before handing it over.

recoveryantra cctv download D:\Footage\clip_00000000.h264 -o D:\Handover

The whole clip, byte-exact, SHA-256 verified.

recoveryantra cctv custom D:\Footage\clip_00000000.h264 --from 1200 --to 3900 -o D:\Handover

The range that matters and nothing either side of it, remuxed losslessly by default.

recoveryantra cctv extract D:\Footage --channel 3 -o D:\Handover

Everything from one camera, once the index says which channel it is.

recoveryantra cctv frames D:\Footage\clip_00000000.h264 --from 1200 --to 1206 -o D:\Handover

A few stills for the claim form or report.

recoveryantra cctv report D:\Footage -o D:\Handover

A written report of every clip's channel, time, codec and hash.

Options, and when to use them

--unitGive --from/--to in seconds instead of frames when you are working from a timestamp rather than a frame number.
--reencodeOnly when the exact frame range matters more than keeping the recorder's own bytes - every pixel becomes new, and the screen and the sidecar both say so.
--channelNarrow `cctv extract` to one camera once `cctv index` or `cctv clips` has said which channel it is.

Best practice

  • Identify and index the recorder before choosing a clip, so the range asked for is the range that actually matters
  • Prefer the lossless cut; only re-encode when the exact frame range is required and say so in the handover notes
  • Keep the original clip and every cut's provenance sidecar; a re-encoded clip is a fair representation, not the recorder's bytes

What this will not do

  • Channel and start time are only as good as the recorder's own table - a table-less disk's clips carry inferred camera labels and unknown times, never an invented channel number
  • A clip whose parameter sets were lost may not play in every viewer, and is marked as such rather than listed as normal

Hit one of these limits? The situation chooser names the product or the method that gets past each one, case by case.

Also covered by SakshyaYantra Enterprise

Files deleted from a cloud-synced folder are past the provider's retention

RecoverYantraSuiteCloud account recoveryIn the app

Files were removed from a OneDrive, Google Drive or Dropbox folder and the provider's own recycle bin no longer has them. The local cache on the machine may still hold copies.

How to recognise it

  • The provider's web interface shows nothing to restore
  • The deletion is older than the retention window
  • The machine that held the folder is still available

Procedure

  1. Check the provider's version history firstWhere it still holds the file, that is the complete and correct answer, and it takes minutes.
  2. Recover the local sync cache from the machineThe client keeps local copies and metadata that frequently survive the deletion.
  3. Stop using the machine while this is outstandingThe cache is on the same volume as everything else the machine writes.

Commands

recoveryantra recover --device \\.\PhysicalDrive0 -o E:\Out

Recover deleted files, including the cloud client's local cache.

recoveryantra search E:\Out "quarterly report"

Find the specific document across a large recovery.

Options, and when to use them

--modesmart. Cache files are ordinary files on the volume.
--reportUseful when the client needs to show what was and was not recoverable.

Best practice

  • Exhaust the provider's own version history before doing anything else
  • Take the machine out of use as soon as the loss is reported
  • Search rather than browse: a full-volume recovery is too large to read by eye

What this will not do

  • The provider's copy of the account is not read directly; the local cache is what is recovered here
  • A machine that has been in heavy use since the deletion will have overwritten much of the cache

Hit one of these limits? The situation chooser names the product or the method that gets past each one, case by case.

10 scenarios

Recovery bench procedure

How a professional handles the media itself: imaging first, assembling unknown arrays, repairing what came back, and working a mixed case.

Imaging a failing drive, bad regions retried then logged

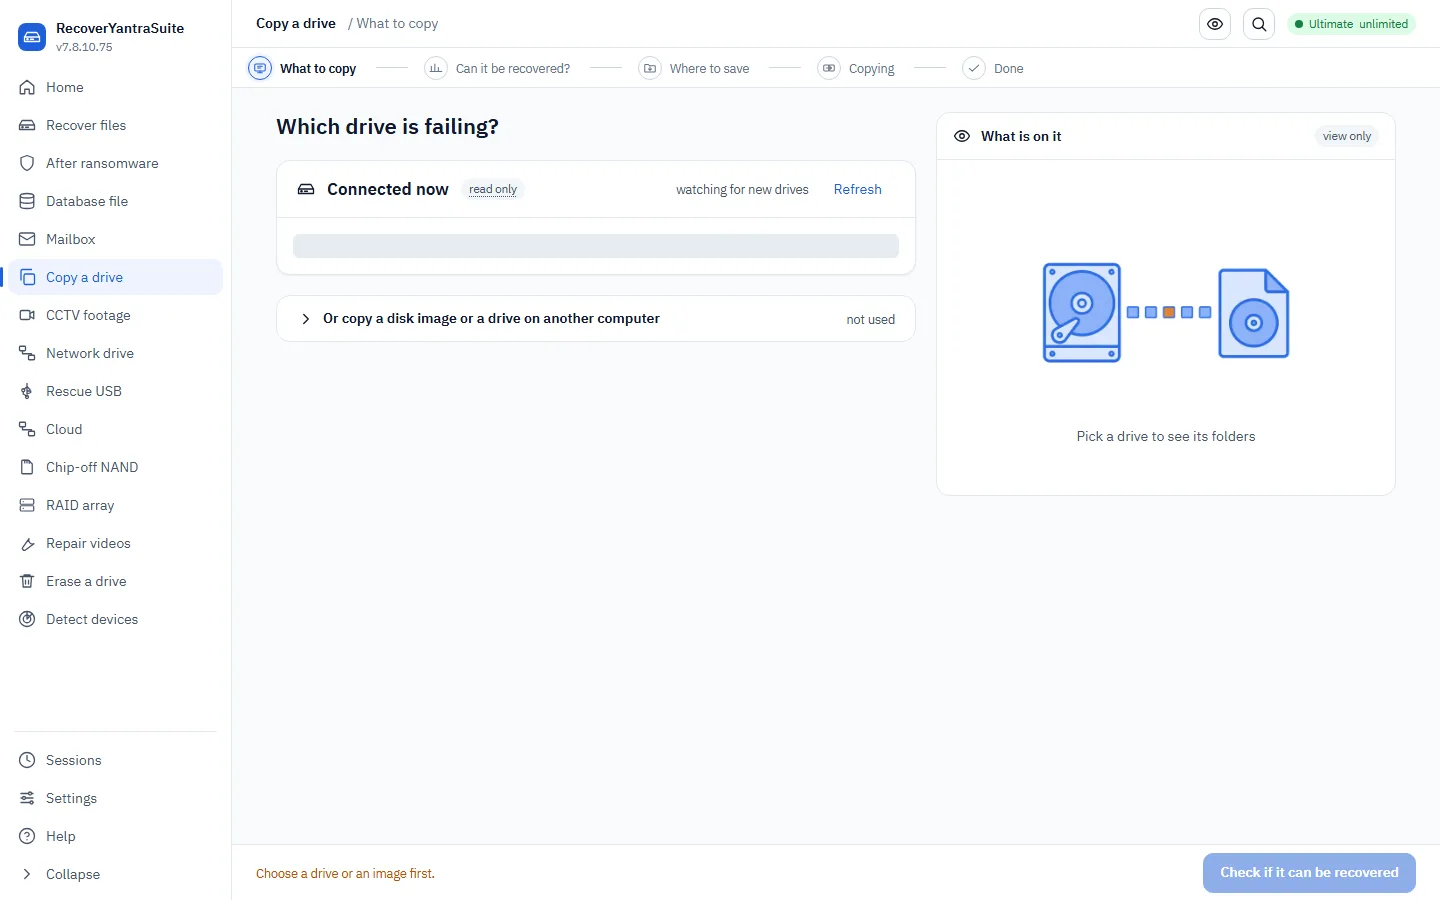
A recovered video will not play

RecoverYantraSuiteRepair broken videoIn the app

The recovery listed a video as recovered, but the file will not open, or plays sound with no picture. This is normally a missing or inconsistent index rather than missing picture data.

How to recognise it

  • The player reports an unsupported or corrupt file
  • Audio plays but the picture is absent
  • The file size looks plausible

Procedure

  1. Run the video repair over the recovery folderIt rebuilds the index in the recovered COPY, which is what most players read.
  2. If that is not enough, repair using a healthy clip from the same deviceA reference file from the same camera donates structure only; the picture data comes entirely from the damaged file.

Commands

recoveryantra fixvideos D:\Recovered

Repair the index of every unplayable video in the folder.

recoveryantra fixwith --file broken.mp4 --reference good.mp4 -o fixed.mp4

Rebuild a missing index from a healthy clip by the same device.

Options, and when to use them

--referenceMust be from the SAME camera or phone. A reference from a different device produces a file that opens and is wrong.
-oWrite the repaired copy separately when the original has to be preserved exactly as recovered.

Best practice

  • Repair the copy, never the original recovery output
  • Confirm the repaired file plays before reporting it as recovered
  • Sound-but-no-picture almost always means the index survived and the media was cut short; check the recovery for a size warning

What this will not do

  • Picture data that was overwritten on the source cannot be rebuilt by anything
  • A repaired file is reported as repaired, not as byte-exact
  • The repair workspace is in the Suite; the Imager extracts the file but does not repair it

Hit one of these limits? The situation chooser names the product or the method that gets past each one, case by case.

A client's drive is failing and every read is a risk

RecoverYantraSuiteImage a failing driveIn the app

The drive still reads but is deteriorating. The decision that matters is made in the first ten minutes: read it once, carefully, and work from the copy.

How to recognise it

  • Read errors appear in the system log
  • Throughput collapses part way through a read
  • The triage reports the drive as unhealthy

Procedure

  1. Triage briefly, then stop reading the driveTriage establishes the condition. It is not a scan and should not become one.
  2. Image once, with a retry policy chosen in advanceEvery retry is another read of a failing surface. Decide the policy before starting, not while watching it.
  3. Do all the recovery work against the imageThe original goes back to the client having been read once.

Commands

recoveryantra list --triage

Establish condition, bus and device class.

recoveryantra image --device \\.\PhysicalDrive2 -o E:\client\drive.dd --retries 1

One careful pass, with bad regions skipped and logged.

recoveryantra recover --image E:\client\drive.dd -o E:\client\Out --include-intact --report

Recover from the image, not the hardware.

Options, and when to use them

--retriesLow on a deteriorating drive. High retry counts can cost you the areas the imaging has not reached yet.
--formatraw is faster on a marginal drive; convert later if the matter needs an evidence container.
--forceOnly after reading the objection. It can override a same-drive destination, which would overwrite the data.

Best practice

  • Decide the retry policy before the first read
  • Keep the skip map: it tells you which recovered files sit over unreadable regions
  • Return the original to the client as soon as the image is verified

What this will not do

  • A drive that is mechanically failing needs a cleanroom, and imaging it can finish it
  • Regions that could not be read are absent from the image, and files over them are incomplete

Hit one of these limits? The situation chooser names the product or the method that gets past each one, case by case.

Also covered by SakshyaYantra Enterprise

Loose disks have arrived from an array nobody documented

RecoverYantraSuiteRecover files from disks, cards and imagesIn the app

A set of disks has arrived with no controller, no documentation and no agreed order. The order and geometry have to be established before anything can be read.

How to recognise it

  • Several disks of the same model and size
  • No controller, or a controller that no longer works
  • Nobody at the client knows the configuration

Procedure

  1. Image every disk firstEverything after this is trial and error, and it must be done against copies.
  2. Try automatic detection before assuming anythingLinux md, Intel RST, Synology SHR and Windows dynamic disks all write their layout onto the members.
  3. Where the metadata is gone, test geometries and judge by the filesA correct assembly produces files that open. A wrong one produces a volume that mounts and returns rubbish.

Commands

recoveryantra image --device \\.\PhysicalDrive3 -o E:\arr\d3.dd

Image each disk, labelled with the bay it came from.

recoveryantra raid --members E:\arr\d1.dd E:\arr\d2.dd E:\arr\d3.dd --auto -o E:\Out --include-intact

Let the members' own metadata supply the geometry.

recoveryantra raid --members E:\arr\d1.dd E:\arr\d2.dd E:\arr\d3.dd --level 5 --chunk 131072 --layout left-symmetric -o E:\Out --include-intact

Test a stated geometry when the metadata is absent.

recoveryantra raid --members E:\arr\d1.dd E:\arr\d2.dd --list-volumes

On Windows dynamic disks, list the volumes the set carries.

Options, and when to use them

--autoAlways try first.
--chunkThe variable most worth testing systematically. A wrong value mounts and returns corrupt files.
--layoutOnly change for an array documented as non-standard.
--list-volumesWindows dynamic disks can carry several volumes on one set of disks.

Best practice

  • Image before experimenting, always
  • Judge an assembly by opening files of several types, never by the fact that a volume appeared
  • Write down each combination tried and the result, or you will repeat them

What this will not do

  • An array missing more members than its level tolerates cannot be assembled
  • A member that was partially rebuilt with wrong data will contribute that wrong data

Hit one of these limits? The situation chooser names the product or the method that gets past each one, case by case.

Also covered by SakshyaYantra Enterprise

One case arrives as a laptop, a phone and a recorder

RecoverYantraSuiteRecover files from disks, cards and imagesIn the app

A single job combines several kinds of media, each needing a different acquisition method, and the client expects one answer at the end.

How to recognise it

  • Multiple exhibits with one reference number
  • Different media types with different urgency
  • A deadline that covers all of them

Procedure

  1. Triage everything before starting any of itThe failing item sets the order. Anything deteriorating goes first.
  2. Image what can be imaged; send the phone to RecoverYantra MobileHandsets are not drives and are not imaged the same way; the phone exhibit is acquired in RecoverYantra Mobile and its image or extraction comes back here for recovery.
  3. Keep one output structure per exhibitOne folder per exhibit is what keeps a mixed case reportable.

Commands

recoveryantra list --triage

Condition and class for every attached device.

recoveryantra image --device \\.\PhysicalDrive1 -o E:\case\ex1\laptop.dd

Image the laptop drive.

recoveryantra cctv --device \\.\PhysicalDrive2 --identify-only -o E:\case\ex3

Identify the recorder before committing to an extraction.

recoveryantra recover --image E:\case\ex1\laptop.dd -o E:\case\ex1\Out --include-intact --report

Recover each exhibit into its own folder, with its own report.

Options, and when to use them

--include-intactUsually required for whole-media recovery.
--reportOne per exhibit, so the case file assembles cleanly.
--identify-onlyFor the recorder, before any extraction.

Best practice

  • Triage everything first; let condition set the order
  • One folder and one report per exhibit
  • Record which method was used on which exhibit, because they differ

What this will not do

  • Each medium keeps its own limits: the phone case is bounded by what the handset allows, the recorder by what it has not overwritten
  • A mixed case takes as long as its slowest exhibit

Hit one of these limits? The situation chooser names the product or the method that gets past each one, case by case.

Also covered by SakshyaYantra Enterprise

An Intel RST array will not assemble after a motherboard failure

RecoverYantraSuiteRecover files from disks, cards and imagesIn the app

A desktop or workstation using Intel Rapid Storage Technology has lost its motherboard. The replacement board does not recognise the array, so the volume is unreachable.

How to recognise it

  • The new board shows the disks individually
  • The RST option ROM reports the array as missing or failed
  • Both disks are healthy on their own

Procedure

  1. Image both disksThe array metadata is on the disks, so nothing is lost by working from copies.
  2. Assemble from the members' own metadataIntel RST writes its metadata block onto the members, so the array can be read without the board that made it.
  3. Recover the volumeOnce assembled it is an ordinary Windows volume.

Commands

recoveryantra image --device \\.\PhysicalDrive1 -o E:\rst\d1.dd

Image each member.

recoveryantra raid --members E:\rst\d1.dd E:\rst\d2.dd --auto -o E:\Out --include-intact

Assemble from the Intel metadata and recover.

Options, and when to use them

--autoReads the Intel metadata directly. This is the route for fake-RAID.
--include-intactRequired.
--membersOrder still matters even with automatic detection; keep the images labelled by port.

Best practice

  • Do not let the replacement board initialise or rebuild the array
  • Image both members before any assembly attempt
  • Confirm with files that open, not with a volume that appears

What this will not do

  • If the new board wrote fresh array metadata over the old, the original layout may be gone
  • A degraded RAID 0 cannot be recovered: it has no redundancy

Hit one of these limits? The situation chooser names the product or the method that gets past each one, case by case.

Also covered by SakshyaYantra Enterprise

Files are needed from a Time Machine backup and the Mac is gone

RecoverYantraSuiteRecover files from disks, cards and imagesIn the app

A Time Machine backup disk is available but the Mac that made it is not. Reading the disk naively returns correctly named files with no contents.

How to recognise it

  • The backup disk mounts and shows a Backups.backupdb folder
  • Files inside appear to be zero bytes
  • The original Mac is unavailable or has failed

Procedure

  1. Image the backup diskIt is usually the client's only copy at this point.
  2. Read the backup with its hard links resolvedA Time Machine backup is built from hard links. Without resolving them the files read as empty stubs.
  3. Select the moment in time that is wantedA backup holds many dated snapshots of the same machine.

Commands

recoveryantra image --device \\.\PhysicalDrive2 -o E:\tm.dd

Image the backup disk.

recoveryantra timemachine --image E:\tm.dd

Enumerate the machines and dated backups the disk holds.

recoveryantra timemachine --device \\.\PhysicalDrive2 --offset 209715200

Read the backup directly, giving the volume offset when it cannot be found automatically.

Options, and when to use them

--imagePreferred over --device: work from the copy.
--offsetOnly needed when the partition table is damaged and the volume cannot be located automatically.

Best practice

  • Image the backup disk before reading it
  • Establish which dated backup the client actually wants before extracting everything
  • Check that recovered files have real contents, not only real names

What this will not do

  • Broken hard links are reported rather than written out as empty files
  • A backup disk that was itself failing may have lost the very generation that is wanted

Hit one of these limits? The situation chooser names the product or the method that gets past each one, case by case.

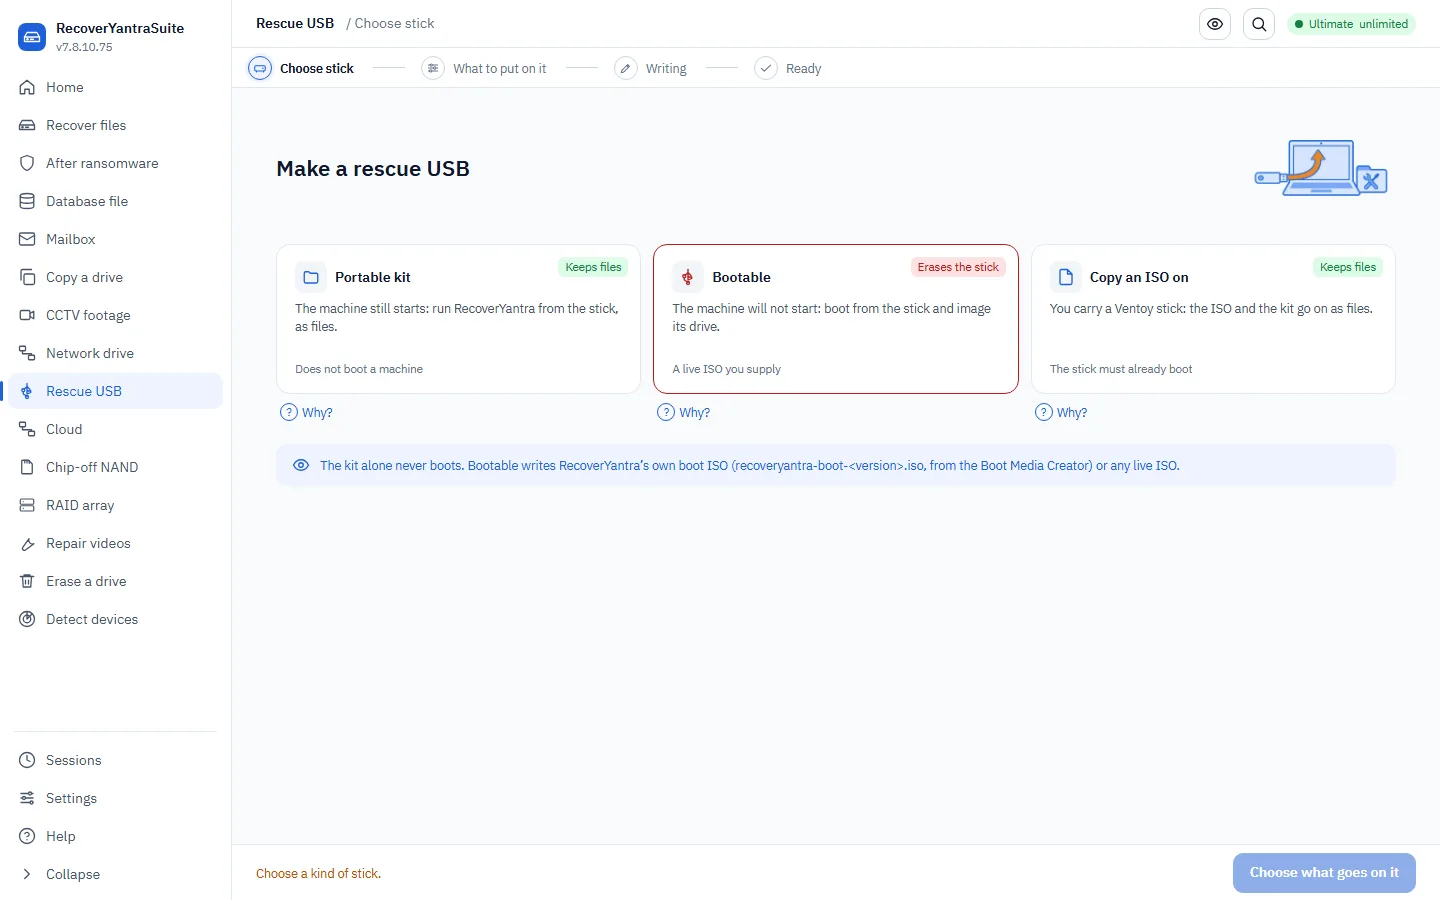
A laptop will not start and its data is needed

RecoverYantraSuiteBootable rescue USBIn the app

The machine does not boot. The disk may be perfectly healthy, and the fastest safe route is often to read it without dismantling the machine.

How to recognise it

  • The machine powers on but does not reach the operating system
  • The disk is soldered, or the machine is under warranty
  • There is no spare machine to put the disk in

Procedure

  1. Prepare rescue mediaA stick that boots the machine into an environment that can read the disk read-only.
  2. Boot the machine from the stick and image the diskImaging first keeps the option of trying something else.
  3. Recover from the image on the benchThe failed machine is not the place to do the recovery work.

Commands

recoveryantra bootusb --target E:\

Lay the toolkit onto the stick.

recoveryantra bootusb --target E:\ --payload-iso D:\live-linux.iso

Make the stick genuinely bootable from a live Linux image.

recoveryantra acquire -o E:\Evidence --retries 1

From the booted stick: pick the drive from a numbered list and image it to the stick.

recoveryantra recover --image E:\Evidence\disk.dd -o F:\Out --include-intact

Recover from the image back on the bench.

Options, and when to use them

--payload-isoRequired to make the stick actually boot. Writing an ISO ERASES the stick, so use a stick with nothing on it.
--targetConfirm this is the stick and not an external evidence drive.
--retriesKeep low if the disk in the dead machine is also suspect.

Best practice

  • Check the ISO carries a USB boot record before relying on the stick at a customer site
  • Image to external storage, never back onto the machine's own disk
  • Label the image with the machine it came from before leaving site

What this will not do

  • Laying the toolkit onto a stick does not make the stick bootable; that needs an operating system on it
  • A machine that will not power on at all cannot be helped this way

Hit one of these limits? The situation chooser names the product or the method that gets past each one, case by case.

A recovered ZIP or backup archive will not open

RecoverYantraSuiteRecover files from disks, cards and imagesIn the app

An archive came back from a recovery and the archive tool refuses it. Whether this is repairable depends on whether the archive was stored in one piece.

How to recognise it

  • The archive tool reports the file as corrupt or truncated
  • The file size looks plausible
  • Other recovered files from the same scan open normally

Procedure

  1. Check what the recovery itself said about the fileArchives that will not open are flagged during the scan rather than presented as clean recoveries.
  2. Re-run against the image with carving as well as file system parsingA fragmented archive sometimes recovers whole through a different route.
  3. Search the recovery for the individual files insteadWhere the archive cannot be rebuilt, the documents inside it may have been recovered separately.

Commands

recoveryantra recover --image E:\case.dd -o E:\Out --mode smart --include-intact

Run both methods over the source.

recoveryantra search E:\Out "invoice" --category document

Look for the contents directly rather than the container.

Options, and when to use them

--modesmart runs file system parsing and carving together, which is what maximises the chance on a fragmented archive.
--categoryNarrow the search to the kind of file wanted.
--include-intactAdd when the archive was never deleted, only unreadable.

Best practice

  • Read the scan's own notes before re-running anything
  • Where the container cannot be rebuilt, go after the contents
  • Tell the client which files came from inside the archive and which did not

What this will not do

  • An archive whose blocks were reused cannot be rebuilt by any tool
  • Only ZIP-family archives are opened and checked; RAR and 7z are not judged, so they are neither confirmed nor condemned

Hit one of these limits? The situation chooser names the product or the method that gets past each one, case by case.

Several drives are on the bench and each has to be imaged once, then recovered from its image

RecoverYantraSuiteRecover files from disks, cards and imagesIn the app

A bench has a row of drives waiting, some healthy and some not. Each should be copied to an image once, so a failing drive is read as little as possible, and then recovered from that image, overnight and without anyone typing the jobs in one by one. The order has to be enforced: a recovery must never start before its image exists, and a drive that could not be imaged must not go on to fail a second time.

How to recognise it

  • Three or more drives to work through and one operator
  • Some of the drives are old, noisy or already flaky, so every extra read of them costs
  • The same two steps, image then recover, apply to every drive

Procedure

  1. Read the built-in playbook firstimage-then-recover copies each drive to a raw image once, then recovers from that image in smart mode. Each of its two steps is tried once more if it ends failed. Print it, or list the playbooks, before applying one.
  2. Apply it to every drive in one commandName the drives, each a device path or an image file, and one destination folder. One set of jobs is made per drive, and the recovery job of each drive is wired to wait for that drive's own image. Nothing is written until the whole plan is valid, so a refused plan leaves no half-built queue.
  3. Set how many drives may run at onceThe default is 1, one job at a time, and the ceiling is 8. Jobs that read the same drive or write to the same place still run one after the other. Start with a low number and raise it only after seeing that the bench keeps up.
  4. Start the queue and leave itThe queue prints one JSON line for each event and runs until every job has finished. Its state is kept on disk, so an overnight run survives the program closing or the machine restarting: a job that was running goes back in the queue and resumes from its imaging map or recovery checkpoint.
  5. Read what failed, and what was skipped, in the morningA failed job says why. Its recovery job is skipped, with the reason, instead of running out of order. A failed job is tried again up to its retry count, resuming from what is already saved, except where the reason cannot change on a second try: a refused licence, a password that is needed, or a memory shortfall.
  6. Write the batch reportOne report across the batch: what succeeded, what failed and why, and per-job counts and sizes, as html, pdf or docx.

Commands

recoveryantra batch playbook show image-then-recover

Print the steps of the playbook before it is used.

recoveryantra batch playbook apply image-then-recover --sources \\.\PhysicalDrive2 \\.\PhysicalDrive3 E:\Cases\card7.dd --dest D:\Bench\2026-09-30 --name "Bench 2026-09-30"

Make the batch. The output gives the batch id and the ids of the six jobs, two for each source.

recoveryantra batch parallel BATCH20260930-025344-ebafaf 3

Let up to three jobs run together. Jobs that share a drive or a folder are still run one after the other.

recoveryantra batch start BATCH20260930-025344-ebafaf

Run every job that has not finished. Pause and stop are typed in a second terminal while this one runs.

recoveryantra batch status BATCH20260930-025344-ebafaf

How many jobs are queued, running, done, failed or skipped.

recoveryantra batch report BATCH20260930-025344-ebafaf --out D:\Bench\2026-09-30\report --format html pdf

The report across the whole batch.

Options, and when to use them

--sourcesThe drives or image files, separated by spaces. A source named twice is refused.
--destThe one folder every image and every recovery is written under; the playbook can write nowhere else. Choose a different drive from the ones being read, with room for an image of each.
--nameA name for the batch. Without it the playbook's name and the date are used.
--outThe folder the batch report is written into.
--formathtml, pdf or docx, one or more. The default is html and pdf.

Best practice

  • Image each drive once and recover from the image; do not scan a failing drive directly when an image can be made
  • Keep the batch id with the case notes; every later command names it
  • Read the skipped jobs as carefully as the failed ones. A skip is the consequence of a failure earlier in the same drive's steps
  • Write the report before the drives leave the bench

What this will not do

  • Imaging and recovery both need an active licence. Without one every job fails at once with that reason, and the recovery jobs are skipped behind them
  • A playbook never carries a password. A locked drive fails its own jobs with the reason and the rest of the bench carries on
  • Jobs that share a source, a device or an output path never run together, whatever the count
  • The queue does not repair drives. A drive that cannot be read fails its image, and the recovery from that image is skipped

Hit one of these limits? The situation chooser names the product or the method that gets past each one, case by case.

Also covered by SakshyaYantra Enterprise

A lab wants its own bench procedure written once and applied to every drive that comes in

RecoverYantraSuiteRecover files from disks, cards and imagesIn the app

The lab's procedure is not the built-in one. It wants a quick filesystem pass first, so named files are in hand fast, then an image, then a deep carving pass from that image. Typing those as separate jobs for every drive is where mistakes creep in, and where a fragile drive gets read in the wrong order.

How to recognise it

  • The same three or four steps are being typed for every drive
  • A step is sometimes forgotten, or run before the image it needs
  • One drive in the batch is fragile and should be read after the others

Procedure

  1. Write the procedure as a list of steps in a JSON fileEach step has a kind (image, recover or both) and may set a name, an image format (raw or e01), a recovery mode (smart, fs or carve), a retry count, the earlier steps it waits for and, for a recovery, the step whose image it reads. In the file the steps are numbered from 0, and from_step and depends_on_steps use those numbers; the messages and the job records call the first step Step 1. Output paths are patterns that must begin with {dest}, so a playbook can write only under the folder named when it is applied. Three steps look like this: [{"kind": "recover", "name": "Quick", "recover_mode": "fs", "recover_out": "{dest}/{label}-quick"}, {"kind": "image", "name": "Image", "image_format": "raw", "image_out": "{dest}/{label}.img"}, {"kind": "recover", "name": "Deep", "recover_mode": "carve", "from_step": 1, "depends_on_steps": [1], "recover_out": "{dest}/{label}-deep"}]. The third step reads the image that step 1 (the second step) made.
  2. Save it under a nameThe steps are checked in full when it is saved. An unknown setting, a step that waits for a later step, or a recovery that reads an image no earlier step makes is refused with its step number, counting from 1 as the messages do. The two built-in playbooks cannot be replaced. A name is 1 to 64 letters, digits, dots, dashes or underscores.
  3. Apply it to the drives that came inOne set of jobs is made per drive, wired in the order the steps say. Two steps that would write to the same place are refused, so give each output its own pattern, for example {dest}/{label}-{step}.
  4. Hold a later job back where the order mattersList the batch, then make one job wait for another by their ids. A circle is refused and named. If the job it waits for fails or is skipped, the waiting job is skipped with the reason instead of running out of order.
  5. Pause and carry on without losing workPause and stop are typed in a second terminal; the run stops at the next safe point. Resume skips every job already finished and carries an interrupted one on from its own checkpoint.

Commands

recoveryantra batch playbook save lab-triage --file D:\Bench\lab-triage.json --description "Quick pass, image, deep pass"

Save a playbook. The file holds three steps: a recover step in fs mode writing to {dest}/{label}-quick, an image step writing to {dest}/{label}.img, and a recover step in carve mode that reads that image (from_step 1) and writes to {dest}/{label}-deep.

recoveryantra batch playbook apply lab-triage --sources E:\Cases\driveA.dd E:\Cases\driveB.dd --dest D:\Bench\2026-10-02

Make the batch, three jobs for each drive.

recoveryantra batch list BATCH20261002-091500-3fa2c1

The jobs and their ids, and what each waits for.

recoveryantra batch depends BATCH20261002-091500-3fa2c1 J005 --on J003

Make drive B's image wait for drive A's deep pass, so the fragile drive is read after the healthy one is finished.

recoveryantra batch pause BATCH20261002-091500-3fa2c1

Ask a running batch to stop at the next safe point.

recoveryantra batch resume BATCH20261002-091500-3fa2c1

Carry on from where it stopped.

Options, and when to use them

--fileA JSON file: a list of steps, or an object with steps and a description.
--descriptionOne line saying what the playbook is for; it shows in the playbook list.
--onA job this one must wait for; repeat it for several. Leave it off to clear what the job waits for.

Best practice

  • Write the playbook down once and apply it to every drive
  • Give each output its own pattern so no two steps write to the same place
  • Read a fragile drive last, after the healthy ones have finished
  • Print the saved playbook before the first real use

What this will not do

  • A playbook applies the same steps to every source. A drive that needs its own settings is added by hand with batch add
  • Waits made with batch depends are between jobs already queued; they are not part of the saved playbook
  • A playbook has at most 32 steps and never carries a password
  • A job that cannot be read at all fails with the reason, and the jobs that wait for it are skipped rather than failed a second time

Hit one of these limits? The situation chooser names the product or the method that gets past each one, case by case.

Also covered by SakshyaYantra Enterprise

7 scenarios

Ransomware and incident response

Working an active incident, from identifying the strain to stating what can and cannot be recovered.

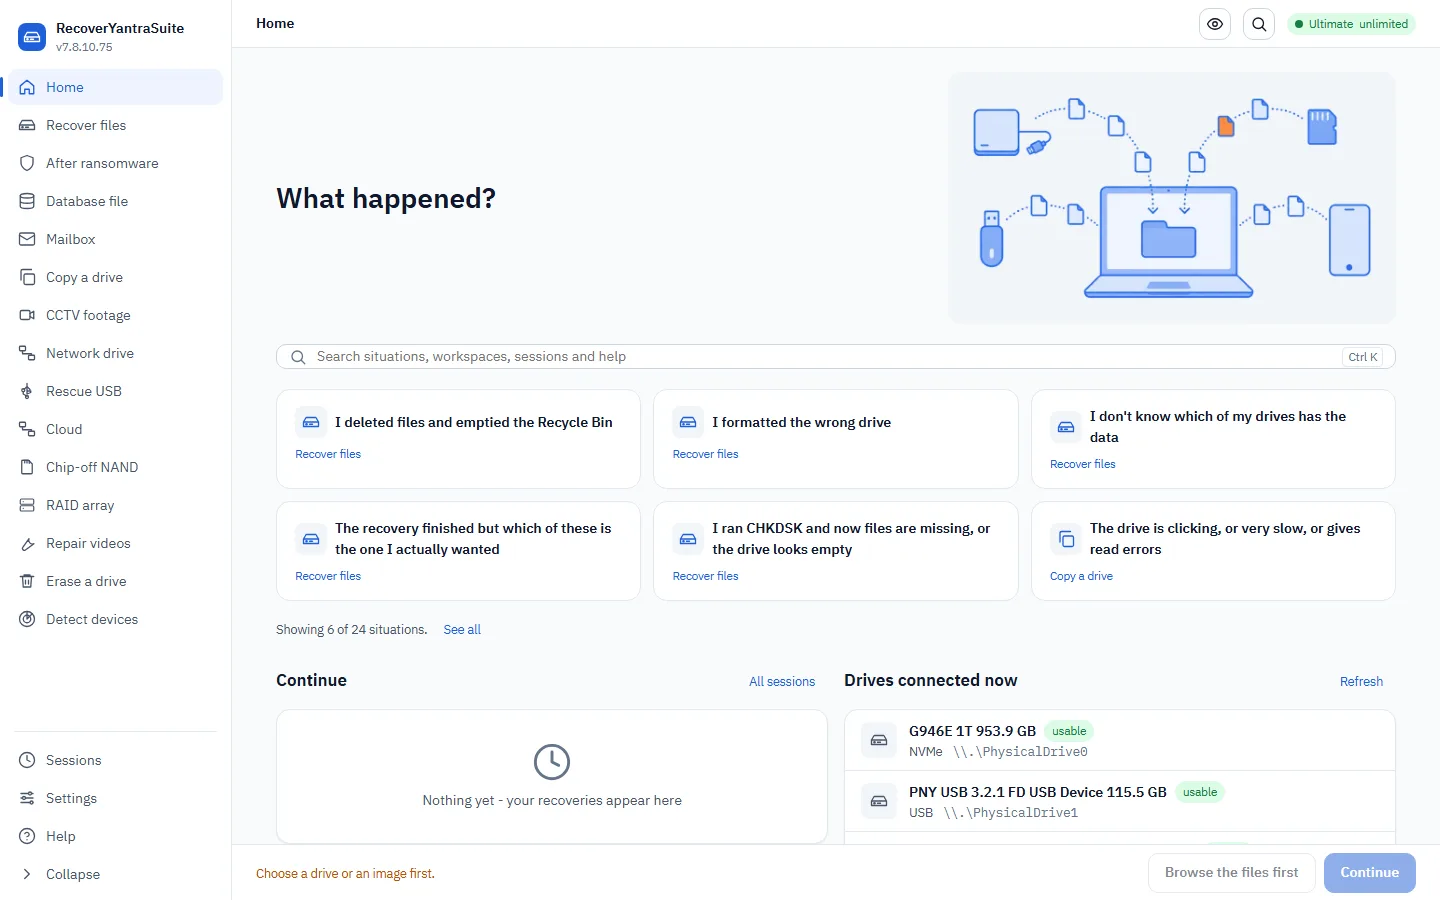
The workspace chooser, including ransomware response

Files across a server were encrypted overnight

RecoverYantraSuiteRansomware triage and recoveryIn the app

Files have been renamed with an unfamiliar extension and a ransom note has appeared. The first hour decides how much comes back, because the originals many strains delete are still in free space.

How to recognise it

  • Files carry a new extension and will not open
  • A ransom note file appears in every folder
  • Scheduled backups have failed or been deleted

Procedure

  1. Take the affected machines off the network and STOP USING THEMContinued use overwrites the free space holding the deleted originals, which is the highest-value recovery available.
  2. Identify the family before planning anythingWhat is recoverable depends entirely on which strain it is.
  3. Triage, then hunt the originals, then state a verdictIn that order. The verdict is only honest once the first two are done.

Commands

recoveryantra ransomware --dir E:\hit --note-file E:\hit\README.txt

Identify the family from the encrypted files and the note.

recoveryantra ransomware --triage E:\hit

How many files are recoverable with no key, salvageable, or truly encrypted.

recoveryantra ransomware --recover-originals E:\hit

Find the originals the encryption process deleted.

recoveryantra ransomware --verdict E:\hit

The full flow fused into one stated outcome with a priority order.

Options, and when to use them

--note-fileThe note is frequently the strongest single identifier of the family.
--recover-originalsThe highest-value step and the most time critical. Run it early.
--verdictUse when a client or an insurer needs one defensible answer rather than three separate outputs.
--usnjrnlAdd when the original PATHS matter as well as the contents.

Best practice

  • Isolate first, then stop using the machines entirely
  • Preserve a copy of the ransom note and a sample encrypted file
  • Do not rename or delete the encrypted files; they are evidence and sometimes partly recoverable
  • Work from an image where the incident may be litigated

What this will not do

  • Strong encryption with a key held only by the attacker cannot be broken by anyone
  • Every hour the machines stay in use reduces what can be recovered from free space

Hit one of these limits? The situation chooser names the product or the method that gets past each one, case by case.

The attacker deleted the backups before encrypting

RecoverYantraSuiteRansomware triage and recoveryIn the app

Backups have been deleted or encrypted as part of the attack. Windows shadow copies and file-system snapshots are frequently missed by the attacker and are the fastest complete recovery.

How to recognise it

  • Backup jobs report missing or deleted targets
  • The backup server was reachable from the compromised machine
  • The affected volumes are Windows or run on a NAS

Procedure

  1. Check for shadow copies before anything elseThey hold the volume as it was before the encryption, and reading one is far faster and more complete than carving.
  2. Check NAS and volume-manager snapshotsQNAP, Synology and LVM snapshots survive many attacks.
  3. Recover from the snapshot rather than from the encrypted volumeA snapshot recovery returns whole files with their names and folders.

Commands

recoveryantra recover --device \\.\PhysicalDrive1 --vss-list

List the Windows shadow copies present on the volume.

recoveryantra recover --device \\.\PhysicalDrive1 --vss-snapshot {c4a1b2...} -o E:\Out

Reconstruct the volume as it was at that snapshot and recover it.

recoveryantra ransomware --nas-snapshots E:\lvm-metadata.txt

Enumerate NAS and LVM snapshots from the volume metadata.

Options, and when to use them

--vss-listAlways run first on a Windows volume in an incident.
--vss-snapshotFrequently the fastest complete recovery available.
--nas-snapshotsThe equivalent question on QNAP, Synology and LVM estates, and commonly overlooked.

Best practice

  • Check snapshots before committing to any other recovery route
  • Do not let anyone run a clean-up or a reinstall until this is checked
  • Record which snapshot each recovered file came from

What this will not do

  • An attacker who deleted the shadow copies as well leaves nothing on this route, and the product will say the list is empty
  • A snapshot older than the work that matters recovers an older state, not the current one

Hit one of these limits? The situation chooser names the product or the method that gets past each one, case by case.

Large files were only partly encrypted

RecoverYantraSuiteRansomware triage and recoveryIn the app

Several strains encrypt only part of each file to work faster across a large estate. The untouched regions of large documents, databases and virtual disks are still readable.

How to recognise it

  • Very large files were processed suspiciously quickly
  • Parts of a file open or display correctly
  • The strain is identified as one that encrypts intermittently

Procedure

  1. Identify the strain and its encryption patternThe pattern determines which regions survived.
  2. Map the damage before deciding what is worth extractingTriage reports what proportion of each file is intact.
  3. Extract the untouched regionsFor a database or a virtual disk, the intact regions are frequently enough to recover the contents.

Commands

recoveryantra ransomware --dir E:\hit --list

Review the known families and their outlook.

recoveryantra ransomware --triage E:\hit

Damage assessment across the affected folder.

recoveryantra ransomware --verdict E:\hit --memory E:\memory.raw

Full flow, including a scan of a captured memory image for key material.

Options, and when to use them

--triageRun before promising anything. It separates recoverable, salvageable and genuinely encrypted.
--memoryOnly useful if memory was captured while the machine was still running. That is a reason to capture it at the scene.
--listReview the family's known behaviour before planning.

Best practice

  • Capture memory at the scene if the machine is still running
  • Salvaged partial content is labelled as partial everywhere it travels
  • Extract database and virtual-disk contents rather than trying to repair the encrypted container

What this will not do

  • The encrypted regions are not recoverable without the key
  • A partly recovered document is a partial document, and is reported as one

Hit one of these limits? The situation chooser names the product or the method that gets past each one, case by case.

A VMware ESXi estate has been encrypted

RecoverYantraSuiteRansomware triage and recoveryIn the app

A hypervisor estate has been hit. Several strains that target ESXi encrypt the small descriptor files and leave the large flat disks holding the actual data intact.

How to recognise it

  • Virtual machines will not power on
  • Datastore files carry a new extension
  • The -flat.vmdk files are still their original size

Procedure

  1. Establish the strain and its ESXi behaviourThe playbook differs by family, and some encrypt only descriptors.
  2. Check whether the flat disks survivedA flat disk of the expected size is the whole virtual machine's data.
  3. Rebuild the descriptor for each intact flat diskA rebuilt descriptor makes the surviving data readable again.

Commands

recoveryantra ransomware --esxi esxiargs

The recovery playbook for that family.

recoveryantra ransomware --rebuild-vmdk E:\vm\server.vmdk --flat-size 107374182400

Rebuild the descriptor for an intact flat disk.

recoveryantra recover --image E:\vm\server-flat.vmdk -o E:\Out --include-intact

Read the guest file system out of the recovered disk.

Options, and when to use them

--esxiNames the family so the playbook matches the strain actually present.
--rebuild-vmdkFor the common case where the descriptor was encrypted and the flat disk was not.
--flat-sizeMust be the exact byte size of the flat file, read from the file itself. A wrong size produces a descriptor that opens and misreads the disk.

Best practice

  • Take a copy of the datastore files before rebuilding anything
  • Read the exact flat-file size from the file, not from the datastore listing
  • Recover guest data first; rebuilding the estate can follow

What this will not do

  • Where the flat disks themselves were encrypted, this route does not apply
  • Strong encryption of the data remains unbreakable

Hit one of these limits? The situation chooser names the product or the method that gets past each one, case by case.

A decryptor has been found online for the identified family

RecoverYantraSuiteRansomware triage and recoveryIn the app

A published decryptor appears to exist for the strain. Running an unverified executable against the client's only remaining data is how a single incident becomes two.

How to recognise it

  • The family has been positively identified
  • A tool is available from somewhere on the internet
  • The client is under pressure to act quickly

Procedure

  1. Check the index for a legitimate published decryptorIt names the tool, the publisher and the scope, or states that none exists.
  2. Verify the downloaded file before running itCompare its hash against the catalogue entry for the tool.
  3. Test on copies, never on the only remaining dataA decryptor that behaves unexpectedly must not be able to make things worse.

Commands

recoveryantra ransomware --decryptor stop_djvu

The offline decryptor index for that family: publisher, key status and scope, or a statement that none exists.

recoveryantra ransomware --decryptor stop_djvu --verify-tool E:\downloads\decryptor.exe

Hash the downloaded tool and check it against the named family's catalogue entry.

Options, and when to use them

--decryptorRun before searching the internet, not after. It also states when no legitimate tool exists.
--verify-toolAlways. A tool from anywhere other than the named publisher is an unknown executable aimed at the client's last copy.

Best practice

  • Verify before running, on copies, with the originals preserved
  • Where the index says no decryptor exists, that is the answer; do not substitute an unverified tool
  • Record the tool, version and hash used, in the incident notes

What this will not do

  • Most modern families have no published decryptor and the index says so
  • A decryptor covers a specific time window or key set; it may not apply to this victim even for the right family

Hit one of these limits? The situation chooser names the product or the method that gets past each one, case by case.

The affected machine is still running

RecoverYantraSuiteImage a failing driveIn the app

The machine has been found still powered on during an active incident. What is captured before it is switched off cannot be captured afterwards.

How to recognise it

  • The machine is on and the encryption may still be in progress
  • Nobody has pulled the power yet
  • The incident may be litigated or claimed against

Procedure

  1. Isolate the machine from the network without powering it offPull the cable or disable the adapter. Powering off destroys memory.
  2. Capture memory before anything elseSome strains leave key material in memory, and it is gone the moment the machine stops.
  3. Then image the diskThe disk survives a power cycle; memory does not, so it goes second.

Commands

recoveryantra image --device \\.\PhysicalDrive0 -o E:\incident\disk.dd --format e01

Image the disk to an evidence container after memory is captured.

recoveryantra ransomware --verdict E:\hit --memory E:\incident\memory.raw

Feed the captured memory into the verdict so key material can be searched for.

Options, and when to use them

--formate01 for anything that may be claimed against or litigated; it carries the acquisition metadata.
--memoryOnly has anything to work with if memory was captured before shutdown.
--forceOnly after reading the objection; the same-drive case would overwrite the evidence.

Best practice

  • Isolate without powering off
  • Memory first, disk second
  • Record the time of every step: an incident timeline is built from these
  • Do not run remediation tools on the machine before it is imaged

What this will not do

  • Memory cannot be captured after shutdown, and there is no second chance at it
  • Capturing memory writes nothing to the disk but does change memory itself; record the tool and time used

Hit one of these limits? The situation chooser names the product or the method that gets past each one, case by case.

The estate is encrypted and nobody knows where it started

RecoverYantraSuiteRecover files from disks, cards and imagesIn the app

Multiple machines are affected and the entry point is unknown. Recovering the data and establishing the entry point are two different jobs, and confusing them costs both.

How to recognise it

  • Several machines encrypted within a short window
  • No obvious first victim
  • Insurers or regulators will ask how it started

Procedure

  1. Separate the two objectives explicitlyRecovery restores the business; investigation answers how it happened. They compete for the same machines.
  2. Preserve at least one affected machine untouchedIf everything is remediated, the question of entry point becomes unanswerable.
  3. Recover the restThe business can be restored from the machines that are not being preserved.

Commands

recoveryantra recover --image E:\incident\host3.dd -o E:\Out --include-intact --report

Recover data from an imaged host.

recoveryantra search E:\Out "invoice" --state deleted

Locate specific documents in a large recovery, separating deleted from present.

Options, and when to use them

--include-intactRequired: most files here were encrypted in place, not deleted.
--stateWhether a document was found deleted or present is frequently the point in a dispute.
--reportOne per host, so the incident file assembles.

Best practice

  • Nominate and preserve at least one machine before remediation starts
  • Image before recovering on anything that may be examined later
  • Keep one case reference across every host

What this will not do

  • Establishing an entry point needs forensic examination, which is RecoverYantra Forensics rather than Rescue
  • Machines already rebuilt cannot be examined afterwards

Hit one of these limits? The situation chooser names the product or the method that gets past each one, case by case.

6 scenarios

Database files

Getting tables and rows out of a data file when the engine will not start or will not attach it.

Database recovery: the engines covered

SQL Server will not attach an MDF file

RecoverYantraSuiteDatabase row extractionIn the app

The database will not attach and the most recent backup has failed or is too old. The data file itself is present and the rows can be read out of its pages.

How to recognise it

  • SQL Server reports the file as corrupt or a different version
  • The instance will not start, or the database is marked suspect
  • The .mdf and possibly the .ldf are present

Procedure

  1. Take the instance offline and copy the filesExtracting from files a running engine is writing to produces rows from a state that never existed.
  2. Identify the file before planning the workIdentification names the engine and the recovery method, which decides whether this is a short job.
  3. Extract the tables and rows to CSVThe rows are then loadable into a working instance.

Commands

recoveryantra db --identify E:\copy\accounts.mdf

Name the engine and the recovery method that applies.

recoveryantra db --recover E:\copy\accounts.mdf --out E:\Out\accounts.csv

Extract records from the data file to CSV.

recoveryantra db --coverage

Review which database families are covered and at what tier.

Options, and when to use them

--identifyAlways first. It decides the plan.
--recoverWork from a COPY, with the instance offline.
--outWrite to CSV whenever the rows are going to be reviewed or loaded elsewhere. Deleted rows are exported flagged; keep the flag.
--coverageUse when scoping or quoting; the tier matters more than presence in the list.

Best practice

  • Always work from a copy, with the engine stopped
  • Check the row counts against what the business expects before reporting success
  • Preserve the deleted-row flag through to whatever is handed over

What this will not do

  • A live, running database is not repaired by this route
  • Pages that were never written to disk, or have been overwritten since, are not recoverable
  • This recovers data, not a complete server with its users, permissions and jobs

Hit one of these limits? The situation chooser names the product or the method that gets past each one, case by case.

A MySQL InnoDB tablespace is orphaned

RecoverYantraSuiteDatabase row extractionIn the app

An .ibd file exists but the MySQL instance that owned it is gone or will not start, so the table cannot be attached in the normal way.

How to recognise it

  • The server will not start, or the table is missing from the catalogue
  • The .ibd files are present in the data directory
  • There is no usable dump

Procedure

  1. Copy the tablespace files outWork from copies with the server stopped.
  2. Identify each fileIdentification confirms the engine and the format version.
  3. Extract the rowsThe table's own dictionary information is read where it survives, so columns come back named.

Commands

recoveryantra db --identify E:\copy\orders.ibd

Confirm the engine and the recovery route.

recoveryantra db --recover E:\copy\orders.ibd --out E:\Out\orders.csv

Extract the rows to CSV.

Options, and when to use them

--identifyFirst, as always.
--recoverFrom a copy, with the server stopped.
--outCSV for loading into a working server.

Best practice

  • Stop the server before copying the files
  • Recover the dictionary information along with the rows where it survives, or columns come back unnamed
  • Validate a sample of rows against something the business recognises

What this will not do

  • A tablespace whose pages have been overwritten cannot be fully recovered
  • Foreign keys, indexes and permissions are not reconstructed; this recovers data

Hit one of these limits? The situation chooser names the product or the method that gets past each one, case by case.

A PostgreSQL cluster will not start

RecoverYantraSuiteDatabase row extractionIn the app

The cluster refuses to start and the heap files are present. Rows, including recently deleted ones, can be read directly out of the heap.

How to recognise it

  • The postmaster refuses to start
  • The data directory is intact
  • The most recent base backup is too old

Procedure

  1. Stop any attempt to start the cluster and copy the data directoryRepeated start attempts can make the state worse.
  2. Identify the heap filesIdentification confirms the version and the page layout.
  3. Extract rows, including dead tuples where they matterA deleted row frequently survives in the page until the table is vacuumed.

Commands

recoveryantra db --identify E:\copy\base\16384\2619

Identify a heap file and its recovery method.

recoveryantra db --recover E:\copy\base\16384\2619 --out E:\Out\rows.csv

Extract rows to CSV, deleted ones flagged.

Options, and when to use them

--identifyConfirms it is a heap file and which version.
--outDeleted rows come out flagged; preserving that flag is what stops recovered deleted data being presented as live data.

Best practice

  • Copy the data directory before anything else
  • Do not vacuum or attempt repair before extracting
  • Keep the deleted flag through every downstream step

What this will not do

  • Rows removed by a completed vacuum are gone
  • This is data extraction, not a cluster repair

Hit one of these limits? The situation chooser names the product or the method that gets past each one, case by case.

Records were deleted from a Microsoft Access database

RecoverYantraSuiteDatabase row extractionIn the app

Rows were deleted from an .mdb or .accdb and are needed back. Access marks records deleted rather than removing them until the file is compacted.

How to recognise it

  • The records are absent from the application
  • The database has not been compacted since the deletion
  • There is no recent backup

Procedure

  1. Copy the file and stop anyone using itContinued use, and above all a compact operation, removes the deleted records permanently.
  2. Identify the formatJet 4 and ACE differ, and identification settles which applies.
  3. Extract the records, including deleted onesDeleted records come back flagged as deleted.

Commands

recoveryantra db --identify E:\copy\contacts.accdb

Confirm the format and the route.

recoveryantra db --recover E:\copy\contacts.accdb --out E:\Out\contacts.csv

Extract records, deleted rows marked.

Options, and when to use them

--identifyDistinguishes Jet 4 from ACE.
--outCSV keeps the deleted flag as a column.
--memoRequired for a dBASE file with a memo side-file; without it long text fields come back empty.

Best practice

  • Stop use of the database immediately, and above all do not compact it
  • Work from a copy
  • Present recovered deleted records as recovered deleted records

What this will not do

  • A compacted database has genuinely removed the deleted records
  • An Access database protected with a password needs that password

Hit one of these limits? The situation chooser names the product or the method that gets past each one, case by case.

A MongoDB collection will not load

RecoverYantraSuiteDatabase row extractionIn the app

A WiredTiger collection file is present but the server will not start or will not read it, and the documents are needed.

How to recognise it

  • mongod fails to start or reports a corrupt collection
  • The collection-*.wt files are present
  • There is no usable dump

Procedure

  1. Copy the data directory with the server stoppedAs with any database, extract from copies.
  2. Identify the collection fileIt confirms WiredTiger and the compression in use.
  3. Extract the documentsDocuments are read out of the pages and written out for reload.

Commands

recoveryantra db --identify E:\copy\collection-0-123.wt

Confirm the engine and compression.

recoveryantra db --recover E:\copy\collection-0-123.wt --out E:\Out\docs.csv

Extract the documents.

Options, and when to use them

--identifyConfirms WiredTiger and reports the compression, which decides whether the pages can be read here.
--outWrite the extracted documents out for reload.

Best practice

  • Stop the server before copying
  • Check the document count against what the application expects
  • Where compression is not supported, the product reports it rather than returning approximate documents

What this will not do

  • A page compressed with a codec the build cannot decode yields nothing rather than approximate content
  • Indexes and server configuration are not recovered

Hit one of these limits? The situation chooser names the product or the method that gets past each one, case by case.

Deleted rows are needed from an application's SQLite database

RecoverYantraSuiteDatabase row extractionIn the app

An application stores its data in SQLite and rows have been deleted. SQLite frequently leaves deleted rows in the page or in the write-ahead log.

How to recognise it

  • The application no longer shows the records
  • The .db file and possibly a -wal file are present
  • The database has not been vacuumed

Procedure

  1. Copy the database AND its -wal and -shm files togetherThe write-ahead log frequently holds the page that still has the deleted row. Copying the .db alone loses it.
  2. Identify and extractDeleted rows are recovered from free blocks, unallocated space and superseded pages in the log.
  3. Report deleted rows as deletedThey are flagged, and the flag has to survive the export.

Commands

recoveryantra db --identify E:\copy\app.db

Confirm the format and the recovery route.

recoveryantra db --recover E:\copy\app.db --out E:\Out\rows.csv

Extract rows including recovered deleted ones.

Options, and when to use them

--identifyConfirms SQLite and reports what is present.
--outCSV, with the deleted flag preserved as a column.

Best practice

  • Copy the -wal and -shm files with the database; they are part of it
  • Do not open the database in the application first: that can checkpoint the log and lose the very pages wanted
  • Keep the deleted flag through to the deliverable

What this will not do

  • A vacuumed database has genuinely removed the deleted rows
  • Where only fragments of a row survive, the text is reported as recovered text rather than reassembled into a row that was never seen

Hit one of these limits? The situation chooser names the product or the method that gets past each one, case by case.

5 scenarios

Mail stores

Reading and exporting mail from a store the client refuses to open.

Mail recovery: the stores covered

Outlook reports that the file is not an Outlook data file

RecoverYantraSuiteMailbox recovery (Outlook PST/OST, mbox, Maildir)In the app

Outlook refuses to open a .pst. That message means the header or the index structures are damaged, which is exactly the case the structured reader alone cannot handle.

How to recognise it

  • Outlook reports the file is not an Outlook data file
  • The file is a plausible size
  • Repair tools have not been run, or did not help

Procedure

  1. Copy the store and work from the copyRepair tools rewrite the original. Preserve it before anything runs.
  2. List what the store contains before exportingThe listing says whether the store read cleanly or had to be salvaged, which changes what you can promise.
  3. Export the messages to a format that will openThe deliverable is readable mail, not a repaired container.

Commands

recoveryantra mail E:\copy\archive.pst --list

Show what is in the store and how it had to be read.

recoveryantra mail E:\copy\archive.pst -o E:\Out --format eml

Export one file per message, ready to drag into Outlook.

recoveryantra mail E:\copy\archive.pst -o E:\Out --format mbox

Export as a single mbox container for another client or a review platform.

Options, and when to use them

--listAlways run first. A salvaged read recovers messages but may not recover the folder structure.
--formateml for individual review or reimport into Outlook; mbox for Thunderbird, Apple Mail and review platforms.
-oNever the folder holding the store being read.

Best practice

  • Work from a copy and keep the original untouched
  • Tell the client whether the read was clean or salvaged: they differ in what they can deliver
  • Deliver an index alongside the messages; loose .eml files are not a mailbox anybody can use

What this will not do

  • The product extracts messages; it does not write back a .pst that Outlook will reopen
  • Where the folder hierarchy is lost, messages are still recovered but their folder placement may not be
  • A PST password is a check Outlook makes before opening; it does not encrypt the store

Hit one of these limits? The situation chooser names the product or the method that gets past each one, case by case.

A member of staff has left and only their OST remains

RecoverYantraSuiteMailbox recovery (Outlook PST/OST, mbox, Maildir)In the app

The mailbox has been removed from the server and the only copy is the offline store file on the machine they used. Outlook will not open an OST without its original account.

How to recognise it

  • The mailbox no longer exists on Exchange or Microsoft 365
  • A .ost file is present in the user's profile
  • Outlook will not open it

Procedure

  1. Copy the OST off the machineThe machine may be reissued, which destroys it.
  2. Read the store on its ownThe OST is read directly, without the account that created it.
  3. Export to a format the business can useUsually .eml for reimport, or mbox for review.

Commands

recoveryantra mail E:\copy\user.ost --list

Show what the offline store contains.

recoveryantra mail E:\copy\user.ost -o E:\Out --format eml

Export the messages.

Options, and when to use them

--listEstablish what is there before promising it.
--formateml for reimport into a mailbox; mbox for a review platform.

Best practice

  • Secure the OST before the machine is reissued or wiped
  • Confirm with the business who is authorised to read a former employee's mail before opening it
  • Deliver with an index

What this will not do

  • An OST that was never fully synchronised only holds what it had downloaded
  • The container is not rebuilt; messages are extracted

Hit one of these limits? The situation chooser names the product or the method that gets past each one, case by case.

Mail files came from a Mac or a Linux machine

RecoverYantraSuiteMailbox recovery (Outlook PST/OST, mbox, Maildir)In the app

Mail has arrived in a format nothing on the Windows bench will read: an Apple Mail store, a Thunderbird profile, or a Maildir tree.

How to recognise it

  • Folders full of files with no extension, or .emlx files
  • A Thunderbird or Evolution profile directory
  • No Mac or Linux machine available to open them

Procedure

  1. Point at the store or the folder holding itA directory of stores is processed as a set.
  2. List before exportingThe listing confirms the format was recognised.
  3. Export to a standard formatmbox or eml, depending on where the mail is going next.

Commands

recoveryantra mail E:\copy\Maildir --list

Confirm the format and show what is in it.

recoveryantra mail E:\copy\Maildir -o E:\Out --format mbox

Export the mailbox as a single mbox container.

Options, and when to use them

--listConfirms the store was recognised before you commit to a full export.
--formatmbox keeps the mailbox as one container; eml gives one file per message.

Best practice

  • Preserve directory structure when copying a Maildir or a profile: it carries the folder layout
  • Confirm character encoding on a sample of messages before delivering the whole set

What this will not do

  • Encrypted or password-protected profiles need their credentials
  • The container is not rebuilt in its original format

Hit one of these limits? The situation chooser names the product or the method that gets past each one, case by case.

A mailbox has to be produced for review or disclosure

RecoverYantraSuiteMailbox recovery (Outlook PST/OST, mbox, Maildir)In the app

A mailbox is required in a form a review platform or another party can load, with a record of what was produced.

How to recognise it

  • A request for a mailbox in a specified format
  • A deadline and a defined custodian
  • The original store must not be altered

Procedure

  1. Copy the store and record its hashThe production has to be traceable to the source.
  2. List the contents and record the countThe count is part of the production record.
  3. Export in the requested format with an indexThe index is what makes the production usable and checkable.

Commands

recoveryantra mail E:\copy\custodian.pst --list

Record what the store contains before producing anything.

recoveryantra mail E:\copy\custodian.pst -o E:\Production --format mbox

Produce as a single mbox container.

recoveryantra mail E:\copy\custodian.pst -o E:\Production --format eml

Produce as individual messages where that is what was asked for.

Options, and when to use them

--formatMatch what the receiving side asked for. mbox for a single container; eml for per-message production.
--listThe count and the read method belong in the production record.
-oA clean production folder, separate from the working copy.

Best practice

  • Hash the source store before and after; it must not change
  • Record whether each message came from a clean read or a salvage
  • Produce the index with the messages

What this will not do

  • Where an evidential chain of custody is required, that is RecoverYantra Forensics rather than Mail
  • Salvaged messages may lack folder placement, and the production should say so

Hit one of these limits? The situation chooser names the product or the method that gets past each one, case by case.

A mail store has to be pulled out of a recovered disk

RecoverYantraSuiteRecover files from disks, cards and imagesIn the app

The mail file itself was on a failed or formatted disk, so it has to be recovered from the media before it can be read.

How to recognise it

  • The machine holding the mailbox has failed
  • The store is not on any backup
  • The disk is readable or has been imaged

Procedure

  1. Recover the disk firstThe mail store is an ordinary file on the volume.
  2. Locate the store in the recovery outputA full-volume recovery is too large to browse.
  3. Read the recovered store and export the messagesA store recovered from free space is frequently damaged, so expect a salvage read.

Commands

recoveryantra recover --image E:\machine.dd -o E:\Out --include-intact

Recover the volume, including files that were never deleted.

recoveryantra mail E:\Out\Documents\Outlook\archive.pst --list

Check what the recovered store holds.

recoveryantra mail E:\Out\Documents\Outlook\archive.pst -o E:\Mail --format eml

Export the messages.

Options, and when to use them

--include-intactUsually required: the store was not deleted, the volume failed.
--listA recovered store is more likely to need a salvage read; the listing says which happened.
--formateml for reimport, mbox for review.

Best practice

  • Recover to separate storage, then read the store from there
  • Expect a salvaged read on a store recovered from free space, and say so when reporting
  • Check the message count against what the user expects

What this will not do

  • A store whose blocks were partly overwritten yields the messages that survived, not the whole mailbox
  • The recovered file is not repaired into a store the client can open; the messages are extracted

Hit one of these limits? The situation chooser names the product or the method that gets past each one, case by case.

24 scenarios

Evidence and investigation

Acquisition, examination and reporting where the method has to be produced alongside the conclusion.

Forensic mode, analysing a single artifact

Prepare a fleet so any machine can be acquired without travelling

SakshyaYantra EnterpriseImage a drive over the networkIn the app

You are responsible for several hundred machines and you do not want the first hour of an incident spent working out how to reach one. The agent is deployed with the rest of the fleet software, before anything has happened, so acquisition is a decision rather than a project.

How to recognise it

  • Machines are spread across sites and subnets, so a network scan finds only what is near you
  • Laptops are often asleep or away when you look
  • Nobody can be sent to sit at the machine
  • The organisation owns and administers the machines

Procedure

  1. Build the package with your console already in itOne MSI, carrying the pairing key, the console's address and the check-in interval. Nothing has to be typed at any desk, and there is no transform or post-install script to get wrong.
  2. Push it the way you push everything elseGroup Policy Software Installation takes MSI and nothing else; Intune and SCCM both accept one. It installs silently and runs as a service, so it is there before anyone logs in.
  3. Let the machines report inEach one says what it is - name, system, volumes, and whether it can be frozen for a live acquisition - when it starts and every few minutes after. You get a roster instead of a scan.
  4. When something happens, pick a machine and acquire itA deliberate act by an operator holding the pairing key. The agent cannot be instructed by the console, so this is never automatic.
  5. If the machine is switched off mid-copy, carry onThe shadow copy survives a restart and the agent remembers it, so the copy resumes into the same image. If that frozen moment is gone, it starts again rather than splicing two moments into one file.

Commands

recoveryantra remote package --platform windows -o D:\rollout --msi --server console.example.internal --site HQ

Build the pushable installer with the console baked in.

recoveryantra remote server --key <pairing-key>

Run on the console so machines can report in.

recoveryantra remote roster

See what has enrolled, and whether each can be frozen.

recoveryantra remote live --host 10.0.4.22 --key <pairing-key> --volume C: -o D:\cases\IR-2026-021\laptop.dd

Acquire one, through a snapshot taken on that machine.

Options, and when to use them

--msiUse it for a real rollout. The folder installers need somebody at each desk, which is not a rollout.
--serverBuild the console's address in, or the agents are silent and you are back to scanning.
--siteLabel the batch - office, department or case - so you can tell which rollout a machine came from.
--keyOne key per site or per case. Rotating a key means generating a new package; the roster shows which key each machine holds so you can see who has not been updated.
--staleOn the roster, include machines not heard from recently, when you are looking for one specific laptop.

Best practice

  • Deploy BEFORE an incident. Installing an agent on a machine you already suspect announces the investigation and changes the machine.
  • Use a different pairing key per site. One key everywhere means one leak everywhere.
  • The MSI carries the key and the server. Store it where you would store a credential, not on a share everyone can read.
  • Check the roster occasionally for machines that stopped reporting - that is how you find an agent that was removed or a machine that was rebuilt.

What this will not do

  • ENROLMENT IS REPORT-ONLY. The console cannot instruct an agent. That is deliberate: an agent that took orders from whatever answered at a hostname would make one server worth every workstation's disk.
  • A machine that is switched off does not report in. The roster shows when each was last heard from.
  • Acquisition connects from the console TO the machine, so the two must be able to reach each other. A laptop behind a home router is enrolled but not reachable until it is on the corporate network.
  • Creating a snapshot allocates space on the endpoint, so a live acquisition writes to the machine even though it never writes to the data being acquired.
  • This is for machines the organisation owns and administers.

Hit one of these limits? The situation chooser names the product or the method that gets past each one, case by case.

Also covered by RecoverYantraSuite

A staff laptop is suspected in an incident and must not be tipped off

SakshyaYantra EnterpriseImage a drive over the networkIn the app

Something has happened - a leak, a suspected intrusion, a departing employee - and the machine belongs to the organisation but sits with the person. Seizing it announces the investigation, and powering it down destroys what is only in memory and in open files.

How to recognise it

  • The machine is in daily use and cannot be collected
  • The custodian must not know an examination has started
  • The organisation owns and administers the machine
  • It is on the network, or comes back to it

Procedure

  1. Record the authority firstConfirm the organisation owns and administers the machine, and record who authorised the acquisition. An authority written afterwards is not an audit trail.
  2. Have the agent already in placeThe agent is deployed with the rest of the fleet software, with a pairing key. Installing it at the moment of the incident is what tips somebody off.
  3. Ask the endpoint what it can do`remote volumes` reports the machine's volumes and whether it can be frozen, before you commit to a transfer that may take hours.
  4. Acquire through a snapshotThe snapshot is taken ON the endpoint, because a volume can only be frozen where it lives, and the frozen view is imaged across the network.
  5. Put the machine backThe snapshot is released and the endpoint is left as it was found. That happens even if the transfer failed part way.
  6. Verify, then work on the copyCheck the image before examining it. Everything after this point rests on it.

Commands

recoveryantra remote volumes --host 10.0.4.22 --key <pairing-key>

Ask the endpoint what it has and whether it can be frozen, before committing to a transfer.

recoveryantra remote live --host 10.0.4.22 --key <pairing-key> --volume C: -o D:\cases\IR-2026-014\laptop.dd

Acquire the running machine through a snapshot taken on it.

recoveryantra recover --image D:\cases\IR-2026-014\laptop.dd -o D:\cases\IR-2026-014\out --profile forensic

Examine the image, hashing every file into the manifest.

recoveryantra audit D:\cases\IR-2026-014\out

Check the audit trail is unbroken before the report goes out.

recoveryantra search D:\cases\IR-2026-014\out

Search the verified copy for the names, keywords or accounts the incident concerns.

Options, and when to use them

--hostThe endpoint's address, from `remote discover` or your own asset list.
--keyThe pairing key the agent was installed with. Without it the agent answers nothing at all.
--volumeThe volume ON THE ENDPOINT, in that machine's own terms: a drive letter on Windows, a mount point on Linux and macOS.
-oWhere the image lands on YOUR machine. A case folder on evidence storage, never a workstation desktop.
--keep-snapshotLeave the snapshot in place afterwards. Use when a second volume from the same machine follows, so it is frozen once rather than twice.
--portOnly when the agent was installed on a non-default port.
--profileforensic hashes every recovered file into the manifest and keeps a flat layout; recovery sorts by type and skips hashing. In an examination this is not a preference.

Best practice

  • `--keep-snapshot` leaves the snapshot in place when you expect to take a second volume from the same machine, so it is frozen only once.
  • `volumes` first, always. It tells you whether the machine can be frozen BEFORE you commit to a transfer that may take hours.
  • Run the agent with administrator rights on Windows, or Volume Shadow Copy cannot create the snapshot.

What this will not do

  • Creating the snapshot allocates space on the endpoint. A live acquisition therefore WRITES to the machine, even though it never writes to the data being acquired. Say so in the report.
  • A machine that cannot be frozen is refused, not read live. An image of a moving volume is not a point in time.
  • The Windows route is certified against a real machine. The Linux and macOS routes are implemented and not yet certified.
  • This is for machines the organisation owns and administers. It is not a way into somebody else's computer.

Hit one of these limits? The situation chooser names the product or the method that gets past each one, case by case.

Also covered by RecoverYantraSuite

A server cannot be taken offline but its data must be captured now

SakshyaYantra EnterpriseImage a drive over the networkIn the app

A production server is the subject of an investigation or has been attacked. Shutting it down costs the business more than the investigation is worth, and rebooting it would destroy the state you came for.

How to recognise it

  • The machine cannot be stopped
  • Its disks cannot be removed
  • The data is changing while you look at it

Procedure

  1. Record the authority and the scopeWho asked for this, over which machine, and on what basis.
  2. Check what the server can actually doWindows offers a shadow copy. Linux can be frozen only where the filesystem is on LVM, and a plain partition cannot be. Learn that now rather than after a two-hour transfer.
  3. Acquire through a snapshotSo the image is one moment rather than a smear across however long the copy took.
  4. Release, and confirmThe snapshot is removed and the server is left as it was found.
  5. Verify, then examine the copyThe server keeps running throughout; the examination happens on the image.

Commands

recoveryantra remote volumes --host db01.internal --key <pairing-key>

Find out whether this server can be frozen at all.

recoveryantra remote live --host db01.internal --key <pairing-key> --volume /var -o /cases/db01-var.dd

Acquire the volume through a snapshot while the server keeps running.

recoveryantra recover --image /cases/db01-var.dd -o /cases/db01-out --profile forensic

Examine the image, hashing every file into the manifest.

Options, and when to use them

--hostThe server's address. Use the name your own records use, so the report matches the asset register.
--volumeA mount point on Linux, so /var rather than a device name.
-oEvidence storage with room for the whole volume. The pre-flight measures this before the copy starts.
--keyThe pairing key the agent was installed with.
--portOnly when the agent is not on the default port.
--profileforensic, so every recovered file is hashed into the manifest.

Best practice

  • Take the busiest volume first if the machine is under load - the snapshot fixes the moment, so the earlier it is taken the closer it is to the event.
  • A database on the volume is captured mid-transaction unless it is quiesced first. A snapshot freezes the disk, not the application.
  • Watch the endpoint's free space: the snapshot needs somewhere to keep what changes while it exists.

What this will not do

  • A Linux server whose filesystem is NOT on LVM cannot be frozen, and the acquisition is refused rather than taken live. Acquire it from a boot medium instead.
  • The snapshot is of the disk. Anything held only in memory is not in it.
  • The Linux route is implemented and not yet certified against a real machine.

Hit one of these limits? The situation chooser names the product or the method that gets past each one, case by case.

Also covered by RecoverYantraSuite

A verified image is needed for proceedings

An exhibit has to be acquired in a way that will withstand scrutiny: the source unchanged, the copy provably identical, and the method recorded alongside the result.

How to recognise it

  • The matter may reach court, a tribunal or an insurer
  • The exhibit must be returned in the state it arrived
  • The examiner must be able to state their method

Procedure

  1. Record the authority before touching the exhibitOperator, lawful basis, organisation and case reference belong on the acquisition, not added afterwards.
  2. Engage a write block, hardware if availableWhere no hardware blocker is available, the software block is engaged and reported as a software block.
  3. Acquire to an evidence container and verifyThe image is hashed on read and verified on completion.

Commands

recoveryantra acquire -o E:\Case\Ex1 --write-block --operator "A Sharma" --authority warrant --org "Valuepitch" --case FIR-4471

Acquire with the authority recorded on the acquisition itself.

recoveryantra image --device \\.\PhysicalDrive2 -o E:\Case\Ex1\disk.E01 --format e01 --retries 2

Image to a compressed evidence container.

recoveryantra recover --image E:\Case\Ex1\disk.E01 -o E:\Case\Ex1\out --profile forensic

Examine the acquired image in forensic mode, so every item is hashed and the custody manifest is written.

Options, and when to use them

--write-blockUse on every evidential acquisition without a hardware blocker. Report which one you used; do not describe a software block as hardware.
--operatorThe individual asserting lawful authority.
--authorityWarrant, consent or statutory power. The field records the assertion; it does not create the authority.
--caseSet at acquisition so every later artefact carries the same reference.
--formate01 carries the acquisition metadata other forensic tools expect.

Best practice

  • Set forensic mode before the first scan, not after
  • Record the authority at acquisition; adding it later leaves the earliest entries with a different reference
  • Photograph the exhibit and its labels before connecting anything
  • Verify the image and record the verification result

What this will not do

  • A software write block is an operating-system measure and is not equivalent to a hardware write blocker
  • Physically damaged media needs a cleanroom before it can be acquired at all

Hit one of these limits? The situation chooser names the product or the method that gets past each one, case by case.

Also covered by RecoverYantraSuite

An investigation needs an ordered account of what happened

SakshyaYantra EnterpriseForensic examination and reportingIn the app

The question is not what a file contains but what happened on the machine, in what order. That answer is assembled from many artefacts, not from one.

How to recognise it

  • A defined incident window
  • A question about sequence: what ran, when, and after what
  • An acquired image to work from

Procedure

  1. Build the full timeline before filtering itNarrowing first hides the context that makes a sequence interpretable.
  2. Bound it to the incident windowAn unbounded timeline from a busy machine is too large to read.
  3. Export the relevant window for the reportThe report carries the bounded extract; the working timeline stays in the case file.

Commands

recoveryantra timeline E:\Case\Ex1\artefacts --out E:\Case\Ex1\timeline.csv

Build the combined timeline from the artefacts and write it to CSV.

recoveryantra timeline E:\Case\Ex1\artefacts --start 2026-03-01 --end 2026-03-08 --out E:\Case\Ex1\window.csv

Bound it to the incident window.

recoveryantra timeline E:\Case\Ex1\artefacts --kind prefetch --limit 200

Narrow to execution evidence while testing a hypothesis.

Options, and when to use them

--startBound the timeline once the window is known.
--endThe other bound. Set both.
--kindNarrowing hides context. Establish the sequence on the full timeline before filtering for the report.
--limitA capped timeline is a sample, not the record. Remove the cap before the run that produces the report.
--outCSV whenever the timeline goes into a report or a review platform.

Best practice

  • Full timeline first, filtered extract second
  • Record the machine's own clock setting and time zone; every timestamp inherits it
  • Keep the unfiltered export in the case file

What this will not do

  • A timeline is only as complete as the artefacts acquired
  • Timestamps can be altered; corroborate a critical sequence across more than one artefact type

Hit one of these limits? The situation chooser names the product or the method that gets past each one, case by case.

A memory image was captured and has to be examined

SakshyaYantra EnterpriseForensic examination and reportingIn the app

Memory was captured while the machine was running. It answers questions the disk cannot: what was executing, what was connected, and what was injected.

How to recognise it

  • A physical memory image exists
  • The question concerns running state rather than stored files
  • The kernel build of the source machine is known or discoverable

Procedure

  1. Identify the operating system and kernel firstThe kernel build decides which symbols every other plugin needs, and the answer names them.
  2. Supply the symbols for the exact kernel buildVolatility 3 refuses a run it has no matching symbols for, and names the kernel PDB or banner it needs; nothing is substituted.
  3. List processes, then narrow to the ones that matterInjected-code detection across every process on a large image produces a great deal to review.

Commands

recoveryantra memory info E:\Case\Ex1\memory.raw

Name the operating system and kernel, and the symbols it needs.

recoveryantra memory run E:\Case\Ex1\memory.raw --plugin pslist --os windows --symbols E:\symbols --out E:\Case\Ex1\pslist.json

Processes through Volatility 3, saved so a row can become a finding.

recoveryantra memory run E:\Case\Ex1\memory.raw --plugin malfind --pid 4188 --symbols E:\symbols --json

Injected code in one process, as structured output.

recoveryantra memory finding E:\Case\Ex1\pslist.json --row 12 --case E:\Case\Ex1\case

Record one process row in the case findings, exactly as returned.

recoveryantra memory scan E:\Case\Ex1\memory.raw --action psscan --limit 200

The in-house reader, where Volatility 3 is not installed: processes including terminated ones, with no symbol file needed.

Options, and when to use them

--pluginStart with pslist and netscan; move to cmdline, dlllist, handles and malfind as the question narrows.
--symbolsThe symbol packs or ISF for the EXACT kernel build. The refusal names which ones are missing.
--pidNarrow once triage says which process matters.
--outWhenever the rows may go into the case or another tool.
--limitA limited table is a sample; do not quote it as a total.

Best practice

  • Record the kernel build of the source machine at capture time
  • Never report structured findings produced without matching symbols as verified
  • Keep the raw image; analysis is repeatable, capture is not

What this will not do

  • Memory cannot be captured after shutdown
  • Without matching symbols Volatility 3 cannot read the kernel structures, and the product says which symbols are missing

Hit one of these limits? The situation chooser names the product or the method that gets past each one, case by case.

Chain of custody has to hold from acquisition to report

SakshyaYantra EnterpriseForensic examination and reportingIn the app

The handling of the exhibit will be examined as closely as the findings. The record has to show that nothing was inserted, removed or reordered.

How to recognise it

  • The matter is contested, or likely to be
  • Several people will handle the exhibit
  • Disclosure is expected

Procedure

  1. Work in forensic mode from the first actionIt hashes every item and writes the custody manifest. A recovery-mode scan does not become evidential afterwards.
  2. Verify the audit trail at the close of the caseThe trail is hash chained, so an edit, an insertion or a reorder is detectable.
  3. Verify again with the manifest before disclosureThe chain alone cannot see a trail that was cut short at the end; the manifest holds the sealed receipt that catches it.

Commands

recoveryantra mode forensic

Set before any acquisition or scan.

recoveryantra audit E:\Case\Ex1\out\audit_trail.jsonl

Verify the chain and name the first break, if any. (The trail and manifest are in the recovery's own output folder, E:\Case\Ex1\out.)

recoveryantra audit E:\Case\Ex1\out\audit_trail.jsonl --manifest E:\Case\Ex1\out\recovery_manifest.json

Verify including the sealed receipt, so truncation is caught too.

Options, and when to use them

<set>forensic. It changes real engine behaviour, not only the report wording, and it must be set before the scan.
--manifestTreat as required for evidential work. Without it, a trail cut short at the end still verifies.
<path>Run at the close of the case and again before disclosure.

Best practice

  • Set forensic mode before the first action on the exhibit
  • Run the audit verification twice: at close and before disclosure
  • Record every transfer of the exhibit between people
  • Keep the manifest with the trail; one without the other proves less

What this will not do

  • The product records what it did. It cannot record handling that happened outside it, which is why the physical custody record still matters
  • A verified chain shows the record is intact; it does not by itself establish that the acquisition was lawful

Hit one of these limits? The situation chooser names the product or the method that gets past each one, case by case.

The question is what was run on this machine

SakshyaYantra EnterpriseForensic examination and reportingIn the app

Whether a particular program executed, and when, is answered from several independent Windows artefacts rather than from one.

How to recognise it

  • A question about whether something was run
  • An acquired image of a Windows machine
  • A defined period of interest

Procedure

  1. Collect the execution artefacts togetherPrefetch, ShimCache, BAM, SRUM, Jump Lists and AmCache each record different aspects, and they corroborate each other.
  2. Put them on one timelineSequence is what makes execution evidence interpretable.
  3. Corroborate before concludingA single artefact is weaker than two that agree.

Commands

recoveryantra recover --image E:\Case\Ex1\disk.E01 -o E:\Case\Ex1\Out --include-intact

Recover the artefact files from the image.

recoveryantra timeline E:\Case\Ex1\Out --kind prefetch --out E:\Case\Ex1\exec.csv

Extract the execution artefacts onto a timeline.

recoveryantra search E:\Case\Ex1\Out "tool.exe" --state deleted

Find references to a specific binary, separating deleted from present.

Options, and when to use them

--kindNarrow to execution evidence once the full timeline has given you the context.
--stateWhether an artefact was found deleted or present is frequently the point.
--include-intactRequired: the artefacts were not deleted.

Best practice

  • Corroborate across at least two artefact types before stating that something executed
  • Record the time zone and clock setting of the source machine
  • Preserve the artefact files themselves, not only the parsed output

What this will not do

  • Execution artefacts record that a program ran, not who was at the keyboard
  • Some artefacts are cleared by normal maintenance, so absence is not proof that something did not run

Hit one of these limits? The situation chooser names the product or the method that gets past each one, case by case.

A handset has to be acquired for an investigation

SakshyaYantra MobilePhone acquisition and data recoveryIn the app

A handset is an exhibit. What can be acquired depends on the device, and what may be acquired depends on the authority, and both have to be settled before it is connected.

How to recognise it

  • A handset submitted as an exhibit
  • A warrant, consent or statutory power
  • An unknown model and state

Procedure

  1. Record the authority before connecting anythingOperator, lawful basis, organisation and case reference.
  2. Establish what this device actually allowsThe plan is gated on the device: a modern handset frequently does not permit a full-filesystem acquisition, and the plan says so.
  3. Decide on advanced methods deliberately, on the recordAdvanced methods can alter the device, so they are off until an examiner opts in and that choice is recorded.

Commands

recoveryantra capabilities --tools --operator "A Sharma" --case FIR-4471

See which acquisition methods are actually available on this bench today.

recoveryantra phone --areas --operator "A Sharma" --authority warrant --case FIR-4471

What is recoverable on this device, recorded against the case.

recoveryantra phone --ffs-dfu "CPID:8015 ECID:.. SRTG:[..]"

Establish from the device's own identifiers whether a full-filesystem acquisition is possible.

recoveryantra capabilities --enable checkm8 --operator "A Sharma" --case FIR-4471

Opt in to an advanced method for this case, on the record.

Options, and when to use them

--toolsRun before the exhibit is in front of you. A method with no tool installed is not available however the case is authorised.
--enableRecorded in the audit trail. An advanced method can alter the device, so decide in advance.
--ffs-dfuThe answer for a modern handset is often no, and an unknown chip is never assumed vulnerable.
--authorityThis step in particular should never run without a recorded lawful basis.

Best practice

  • Settle authority and method before the handset is connected
  • Put the device in airliner mode or a shielded bag to stop remote wipe
  • Record the device state as received: locked, unlocked, powered on
  • Disable the advanced method again once the step is complete

What this will not do

  • A locked modern handset's passcode is not recoverable by software; that is silicon and a hardware laboratory, and the product says so
  • Advanced methods are orchestrated through the operator's own tools; no exploit is bundled

Hit one of these limits? The situation chooser names the product or the method that gets past each one, case by case.

Also covered by RecoverYantra Mobile

A device credential is needed from an Android image

SakshyaYantra EnterpriseRecover files from disks, cards and imagesIn the app

An Android image has been lawfully acquired and the device credential is needed to reach protected material within it.

How to recognise it

  • A lawfully acquired Android image
  • Recorded authority covering credential recovery
  • The image contains /data/system

Procedure

  1. Confirm the authority covers this step specificallyCredential recovery is examined closely if the matter is contested.
  2. Work against the acquired imageThis operates on an image already lawfully acquired. It is not a route into a handset that cannot already be read.
  3. Record the attempt and the resultBoth belong in the case record, including an unsuccessful attempt.

Commands

recoveryantra unlock E:\Case\Ex2\data\system --max-pin 6 --operator "A Sharma" --authority warrant --case FIR-4471

Attempt the numeric credential with the authority recorded.

recoveryantra unlock E:\Case\Ex2\data\system --wordlist E:\lists\common.txt --operator "A Sharma" --authority warrant --case FIR-4471

Attempt a non-numeric password from a word list.

Options, and when to use them

--max-pinRaising it beyond 6 costs time that grows sharply with each digit.
--wordlistFor a password rather than a numeric PIN.
--authorityNever run this step without a recorded lawful basis.
--caseTies the step to the same custody record as the acquisition.

Best practice

  • Confirm the authority covers credential recovery before starting
  • Record unsuccessful attempts as well as successful ones
  • Keep the image unchanged; this reads it

What this will not do

  • This works on an image already acquired. It is not a way into a handset that cannot be read
  • A long or complex credential may not be recoverable in any reasonable time

Hit one of these limits? The situation chooser names the product or the method that gets past each one, case by case.

Also covered by RecoverYantraSuite

The tool has to be validated before it is used on a case

SakshyaYantra EnterpriseForensic examination and reportingIn the app

A quality process, an accreditation, or a client requires evidence that the tool performs as claimed on this bench, at this version.

How to recognise it

  • A new bench, or a version upgrade
  • A scheduled validation under the quality process
  • A client or accreditation body asking for evidence

Procedure

  1. Run the shipping engine against known ground truthThe validation runs the same build that will do the work.
  2. Keep the dated report in the quality recordsThe date and the version are what make it evidence.
  3. Describe it accuratelyIt is modelled on the NIST CFTT specifications. It is not a NIST certification and the report says so.

Commands

recoveryantra validate --out E:\Quality\2026-08

Run every group and write the dated report.

recoveryantra validate DFR CARV WB --out E:\Quality\2026-08

Run selected groups.

recoveryantra validate --federated --out E:\Quality\2026-08

Add the Federated-Testing-styled conformance report grouped by tool category.

Options, and when to use them

<groups>Run on a new bench, after an upgrade, and on your quality schedule. It is modelled on CFTT and is not an accreditation.
--outThe quality records store, not the case folder.
--federatedWhen accreditation or a client requires test cases grouped by tool category.

Best practice

  • Validate after every version change, not only at installation
  • Keep every dated report; the series is what shows the process is real
  • Quote the report accurately: modelled on CFTT, not certified by NIST

What this will not do

  • This is a self-validation harness. It is not a third-party accreditation and must never be described as one
  • It validates the engine's behaviour against ground truth, not the examiner's competence
  • RecoverYantra Lab also carries the validate command, but not the forensic workspace this scenario opens

Hit one of these limits? The situation chooser names the product or the method that gets past each one, case by case.

A recorder export has to become evidence a court can rely on

SakshyaYantra EnterpriseFootage intake, decode and conversionIn the app

A station has a DVR export on a pen drive - the recorder's own container, an overlay clock burnt into the picture, and no hash. It has to be read, decoded and recorded so that every frame later shown can be traced to this file and this examiner.

How to recognise it

  • A vendor container or a .dav/.h264 export a normal player refuses
  • An overlay clock in the picture that may not match the case time
  • No hash, no record of who received it or when

Procedure

  1. Probe before decodingTwo readers are run on purpose; where the parser and the decoder disagree the intake says so, and the recorder registry says whether this make and model was tested.
  2. Decode through the ladder to another driveContainer, index, stream, then salvage. The rung that produced each frame is recorded; a salvaged frame is marked, never passed off as normal.
  3. Record the intake in the case with the examiner namedThe source hash, the decode result and the typed name become the exhibit record. One use of the licence is spent here - one source, however many frames. The command prints the case it opened or created, with its folder in brackets; give that folder, exactly as printed, to --case in every later command.

Commands

recoveryantra footage formats

What this build can read, before anything is promised.

recoveryantra footage acquire E:\Exhibits\E3\ch07.dav -o F:\Case-176\decoded

Decode the export through the ladder to a folder on another drive.

recoveryantra footage intake F:\Case-176\decoded --case F:\Case-176 --examiner "S. Menon"

Record the intake; the examiner's name is typed and recorded.

Options, and when to use them

-oAlways a folder on a different drive from the exhibit.
--caseThe case folder; the intake record, the audit trail and every later finding land here.
--examinerTyped and recorded by the software, not authenticated by an account system - and the report says so.

Best practice

  • Hash the source before decoding; the intake record carries it
  • Keep the recorder's overlay clock as text, separate from the decoder's clock and the case clock
  • The registry entry, or its absence, goes in the record

What this will not do

  • A recorder the registry has not tested decodes the same way but the record says it was untested
  • Overlay text is supplied by the examiner, not read by the software

Hit one of these limits? The situation chooser names the product or the method that gets past each one, case by case.

A few frames of footage have to leave the machine for a report

SakshyaYantra EnterpriseFrame-exact video reviewIn the app

An investigating officer needs the three frames that show the vehicle, with their times, in a form a court and a defence expert can check. The video itself must not leave.

How to recognise it

  • A specific moment in a long recording
  • A request for stills with the time on them
  • A defence expert who will ask which frame, from which file

Procedure

  1. Open the asset on the frame server and step to the framePresentation ticks, the decoded index and the overlay text are three fields; the review never merges them into one time.
  2. Bookmark what you see in your own wordsThe bookmark is a finding record in the case, tied to the frame by ordinal and digest.
  3. Capture a frame pack and verify itPNG frames, each with its times, its source hash and extent and its own SHA-256, plus a hashed manifest. Verify it before it leaves.

Commands

recoveryantra review open F:\Case-176\decoded\ch07.mp4

The timeline summary: frames, keyframes, gaps and whether the frames carry times.

recoveryantra review bookmark F:\Case-176\decoded\ch07.mp4 --ordinal 1412 --case F:\Case-176

Record the bookmark in the case at frame 1412.

recoveryantra review frames F:\Case-176\decoded\ch07.mp4 --from 1410 --to 1416 --interval 2 -o F:\Case-176\packs

Four frames, every second one, as a frame pack.

recoveryantra review verify F:\Case-176\packs\pack_<id>.zip

Re-hash every frame and the manifest. The pack is named pack_ and an identifier; give it the file name that review frames printed.

Options, and when to use them

--ordinalThe decoded index of the frame, as the review shows it.
--fromThe first frame of the range, by decoded index.
--toThe last. A single frame is from and to the same number.
--intervalEvery Nth frame between the two; 1 takes them all.
-oA folder on another drive; the pack is written there and verified from there.

Best practice

  • The frame pack is the only unit that leaves the machine - never the video
  • Verify the pack before it is attached to anything
  • State the overlay time as text and the case time separately, each with its own uncertainty

What this will not do

  • A frame the decoder salvaged is marked as such in the pack
  • The pack carries no interpretation; the examiner's reading is a separate, sealed record

Hit one of these limits? The situation chooser names the product or the method that gets past each one, case by case.

A bystander's face must be masked before footage is disclosed

Footage has to go to a party who may not see everyone in it. The mask must hold on every frame, a named person must have checked it, and the original must stay untouched.

How to recognise it

  • A disclosure order with named exclusions
  • A face or a plate that moves across the frame
  • A reviewer who will sign for the redaction

Procedure

  1. Mask the region across the framesPixels in the frame, from one ordinal to another, followed across frames when it moves. The mask is a record with its own chain.
  2. A named reviewer types the decisionApprove or reject, with a name and a note, into the hash-chained audit trail. Recorded by the software, not authenticated.
  3. Export the redacted copyRefused until the decision says approve. The copy carries the mask chain and its hashes; the original stays as received.
  4. Read the leak check before you discloseEvery export re-reads the copy and checks two things: that everything outside the masks is identical to the original, and that each masked region really changed. The result is printed as the leak check, and a failed check ends the command with a failure code. If it fails, do not disclose that copy: a mask over a flat area changes nothing, and a mask that missed the subject hides nothing. Move the mask, track again and export again.

Commands

recoveryantra redact track F:\Case-176\decoded\ch07.mp4 --region 412,88,96,120 --from 1400 --to 1520 --case F:\Case-176

Mask the region and follow it from frame 1400 to 1520.

recoveryantra redact review --case F:\Case-176 --decision approve --reviewer "A. Rao" --note "checked every frame"

The typed decision.

recoveryantra redact export --case F:\Case-176 -o F:\Disclosure

The redacted copy, refused until an approve decision exists, followed by its leak check.

Options, and when to use them

--regionx, y, width, height in pixels of the frame.
--decisionapprove or reject; the export is refused until an approve is recorded.
--reviewerThe name goes into the audit trail and the report.
-oA folder on another drive for the redacted copy.

Best practice

  • Check every masked frame before typing approve
  • Hold back any copy whose leak check failed
  • Keep the unredacted original in the case, never in the disclosure folder
  • Name the reviewer in the report

What this will not do

  • A mask that is not followed across frames leaks when the subject moves; use track for a moving subject
  • The export is a derived item and says so in its provenance

Hit one of these limits? The situation chooser names the product or the method that gets past each one, case by case.

A recording's authenticity is challenged

SakshyaYantra EnterpriseImage and video authenticity examinationIn the app

The other side says the clip was cut, re-encoded or generated. The laboratory has to say what the file's structure and statistics support and what they do not - as evidence, not as a score. A video has its own examination: the still-image tools read one frame, so a video path given to them is refused and pointed at the video exam.

How to recognise it

  • A claim of editing, re-encoding or synthesis
  • A file whose history is unknown
  • A court that will ask which method said what

Procedure

  1. Run the one-button exam that matches the file--exam for a video, --audio for a recording of sound, --synth for a picture or clip suspected of being generated, --document for a PDF or a scan. Each runs every method that applies to that kind of file, and a method that cannot judge this file says so instead of staying quiet. Each writes three reports (Executive, Judicial, DETAILED) and the raw results.
  2. Look at the clip segment by segment--video-timeline lays the signals out along the clip: where the encoding changes, where an edit list or a splice point sits. It reports signals and never a verdict.
  3. For a single frame or a still, use the still-image examinationreview frames writes the frames you name into a frame pack, a zip with each frame as a PNG in its frames folder. Unzip it and run authenticate on one PNG. Without a flag the still-image examination runs every method and ranks the hypotheses, each with the methods for and against it. The software ranks the evidence; the examiner writes the conclusion.
  4. Keep the reports with the caseThe reports are written to the folder named with -o. Name a folder inside the case folder so the reports, the file's digest and every method's output travel with the case.

Commands

recoveryantra authenticate E:\Exhibits\E5\clip.mp4 --video-timeline

The video route runs first: the signals laid out segment by segment along the clip. The still-image methods read a single frame, so a video given to them is refused and pointed here.

recoveryantra authenticate E:\Exhibits\E5\clip.mp4 --exam -o F:\Case-176\auth

The one-button video exam: every applicable method, then the Executive, Judicial and DETAILED reports and the raw results.

recoveryantra review frames E:\Exhibits\E5\clip.mp4 --from 1200 --to 1206 -o F:\Case-176\frames

Write a few frames into a frame pack (a zip of PNGs), to examine one moment as a still.

recoveryantra authenticate F:\Case-176\frame\000010_orig.png --case F:\Case-176 -o F:\Case-176\auth

For a single still or an extracted frame: every still-image method and the ranked hypotheses, with the record written into the case.

Options, and when to use them

--examThe whole video examination in one command, with the three reports written to the -o folder.
--video-timelineThe per-segment view of a clip, for reading where a change sits.
--modelsNamed model packs, each recorded by version in the output; without them only the structural methods run.
--caseThe case folder the still-image examination record is written to.
-oThe folder for the reports and the method outputs.

Best practice

  • Report the methods that opposed the conclusion as well as those that supported it
  • Name the model pack and its version wherever a model contributed
  • Hash the file before the first method runs

What this will not do

  • A model output is an observation, never a finding on its own
  • A file re-encoded by a well-behaved tool can defeat some methods; the record says which ran and which refused
  • The video exam needs the media worker (ffmpeg and ffprobe) that the product carries; a clip it cannot decode is reported as such

Hit one of these limits? The situation chooser names the product or the method that gets past each one, case by case.

Thousands of near-identical pictures have to be cut down before review

A device image was exported into a case and it holds tens of thousands of pictures, many of them the same shot saved, resized or re-shared several times. Reviewing each file on its own is days of work. Grouping the pictures that look alike lets the examiner open one, look at the others in its group, and move on.

How to recognise it

  • A case with 20,000 or more pictures and a deadline that allows a look at a fraction of them
  • The same photograph appears at several sizes, from messaging apps, thumbnail caches and re-saves
  • Reviewers are opening pictures they have already seen

Procedure

  1. Point the grouping at a folder, or at the open caseOn the command line the folder is named. In the gallery, the Find near-duplicates card takes a folder, or every picture in the open case when the box is left empty. The pictures are read and never written to.
  2. Start at the measured default distanceTwo pictures are grouped when their 64-bit pHash values differ by at most 10 bits, and every pair inside a group is within that distance of every other pair. On 3,820 real pictures about 4 clearly different pairs in a million came within it, and up to 57 in a million when look-alikes were counted.
  3. Read what was set asideSolid colours, near-flat scans and smooth gradients produce hashes that many unrelated pictures share. They are listed with the reason and never grouped or dropped in silence. In the measurement set that was 224 of 4,044 pictures, mostly cut-outs on plain white, and none of the 45 real photographs.
  4. Review one picture per group, then the rest of itOpen the representative, then the other members at full size. A group is a list of candidates for the examiner to look at. It does not say what any of the pictures show.
  5. Mark what matters through the galleryTag the representative so the mark travels with the exhibit, and say in the label that it rests on a perceptual-hash grouping.
  6. Keep the parameters with the resultThe output names the algorithm (phash/v1), the distance, the linkage and the tool version. Quote them wherever a group is relied on, so that someone else can repeat the run on the same pictures and get the same groups.

Commands

recoveryantra phash dedup E:\Case-211\Ex4\DCIM

Group the near-duplicate pictures under a folder. The output lists each group with its representative and the exact duplicates inside it, the pictures that had no near-duplicate, the pictures set aside and the statement of what the grouping does not show.

recoveryantra phash hash E:\Case-211\Ex4\DCIM\IMG_0412.jpg

Print the aHash, dHash and pHash of one picture, for a note or to repeat a value somebody else has quoted.

recoveryantra gallery --case F:\Case-211 --type image --sort size --limit 50

Narrow the case wall to pictures, largest first, once the groups are known.

recoveryantra gallery --case F:\Case-211 --tag-asset ev_0412 --label same-shot-17 --examiner R.Iyer

Tag one exhibit and list the wall again.

Options, and when to use them

--typeUse image to keep videos off the wall. A video is not hashed; its frames have to be passed in as pictures.
--tag-assetOnce a group has been looked at, tag its representative so the mark is written into the case with the exhibit.
--labelThe words the tag carries. Say what it rests on, such as the group number and that it came from a perceptual-hash grouping.

Best practice

  • Quote the algorithm, the distance and the tool version wherever a group is relied on
  • Read the pictures set aside for too little detail by eye; they are listed, not judged
  • Open the members of a group before tagging any of them
  • Keep the JSON the run prints with the case, next to the folder it was run on

What this will not do

  • Crops of 5 percent or more on each side, a 10 percent border and a 10 degree rotation were matched at most 47 percent of the time at the default distance, and a flip or a quarter turn is not matched at all on the command line. A picture outside every group is not thereby a different picture
  • Screenshots and scanned pages share large plain areas. In 4,950 pairs of synthetic scanned pages, about 6 pairs in 10,000 fell within the default distance, so confirm those groups by eye
  • A video is not hashed. HEIC and RAW files are read through their embedded preview and flagged as such; a truncated picture is reported, never hashed in part
  • Hashing is the slow part: about 56 pictures a second on 8 threads and 12 on one, measured on one bench machine. 20,000 pictures is about 6 minutes on 8 threads
  • The result is triage. Nothing in it classifies what a picture shows

Hit one of these limits? The situation chooser names the product or the method that gets past each one, case by case.

A hash set from the instructing agency has to be checked against an exhibit

An agency has supplied a hash set for the matter. An exact SHA-256 lookup finds only byte-identical files, and the pictures have been re-saved, resized and re-shared. The examiner needs the pictures that sit close to an entry in the set, listed as candidates with the distance and the set owner's own label, and nothing said about what any picture shows.

How to recognise it

  • A hash set has arrived as JSON, CSV, a text list or a SQLite file
  • An exact-digest check found little or nothing, but the pictures have been through messaging apps or an editor
  • The set belongs to the instructing body and the tool bundles no set of its own

Procedure

  1. Do the exact-digest lookup firstA byte-identical copy of a listed file is answered by an exact SHA-256 lookup with no perceptual step. Import the exact digests where the set has them, look a file up, and keep the perceptual match for what that leaves.
  2. Confirm the set declares its algorithmA set that does not say which algorithm made its hashes, or that has no usable row, is refused. Rows that cannot be used are counted and listed with the reason, never dropped in silence.
  3. Match one questioned picture at a timeThe picture is hashed with the same algorithm and compared with every entry. A set made with an algorithm the tool cannot compute for a picture is refused with the reason; the tool does not guess.
  4. Read each candidate with its distanceA candidate is a set entry within the stated distance of the picture. Its label is passed through exactly as the set's owner wrote it, and nothing is added to it.
  5. Set the chance rate beside itThe output states how many chance candidates a set of that size produces. A large set produces some by chance alone, so a candidate at 2 bits carries a different weight from one at 10.
  6. Look at both pictures, then decideThe match says two pictures look alike at a stated distance. The examiner looks at both and, where the set gives an exact digest, checks it. The finding is the examiner's.
  7. Record the set with the resultThe result carries the set's source, its file SHA-256 and size, and the note that the operator supplied it. Keep them beside the finding.

Commands

recoveryantra hashset lookup E:\Case-211\Ex4\DCIM\IMG_0412.jpg

Exact digest first: is this exact file in a set already imported?

recoveryantra phash match E:\Case-211\Ex4\DCIM\IMG_0412.jpg E:\Sets\agency-set.json

Compare one picture with the supplied set. The output lists every candidate with its distance and label, the chance rate and the set's provenance.

recoveryantra hashset import E:\Sets\agency-exact.csv --kind bad --label "Agency set 2026-09" --source "Instructing agency"

Where the set also lists exact digests, import them so the gallery's known-file filter can use them.

Options, and when to use them

--kindbad flags the listed files and good marks them as ignorable. A set of pictures of interest is imported as bad; the default for import is good, which would tell the gallery to ignore them.
--labelA name for the set in the case, so a later reader can tell which agency list a flag came from.
--sourceWhere the set came from and on what terms; it is kept with every result that uses it.

Best practice

  • Check exact digests first, then run the perceptual match on what is left
  • Keep the set out of anything that leaves the case; the operator supplies it and the result records where it came from
  • Say in the report that a match is a candidate at a stated distance, and give the distance
  • Confirm every candidate by eye before it is written up

What this will not do

  • A candidate says two pictures look alike at a stated distance. It does not say what either shows, and no candidate does not mean the picture is absent: crops, borders, watermarks and rotations defeat the hash to the degrees measured
  • At the default distance a set of 2,000,000 entries gives a single questioned picture about 7 to 114 chance candidates. The command line has no distance switch, so read the chance figure the output prints and confirm each candidate by eye
  • The tool ships no hash set and computes no restricted algorithm. A set made with another algorithm is searched only when it declares that algorithm and the questioned picture can be hashed the same way
  • A picture with too little detail can only give a candidate that is flagged as weak

Hit one of these limits? The situation chooser names the product or the method that gets past each one, case by case.

A perceptual-hash result has to be explained to someone who will challenge it

A group of near-duplicates or a candidate from a hash set is going into a report. The other side's expert will ask what the number means, how often unrelated pictures reach it, what the method cannot see, and whether the run can be repeated by somebody else.

How to recognise it

  • A report sentence is about to rest on a hash distance
  • Opposing counsel or an expert has asked how reliable perceptual hashing is
  • A picture that should have matched did not, or one that should not have did

Procedure

  1. Read the distance as a count of bitsA 64-bit hash differs from another in 0 to 64 places. pHash distances almost always come out even, so a distance limit of 9 behaves as 8. Zero means the two hashes are the same, which is not the same statement as the two files being the same.
  2. Set the chance rate beside the distanceAt the default distance about 4 to 57 unrelated pictures in every million entries fall within it. For a set of 500,000 entries that is about 2 to 29 chance candidates for every questioned picture.
  3. Say what the method cannot seeCrops of 5 percent or more per side, borders, rotations of a few degrees and flips defeat the hash. A questioned picture that was cropped hard will not match its original, and that is a limit of the method and not evidence about the picture.
  4. Treat a weak picture as weakA picture with too little detail is flagged in the output. Its candidates carry that flag into the report, and it is not grouped with others.
  5. Let the other side repeat itEvery result names the algorithm, the distance, the tool version and the libraries used, and the same pictures give the same result whatever the order or the number of threads. Give them the picture list and the parameters, and print the hashes of the two pictures in question so they can compare the values by hand.

Commands

recoveryantra phash hash E:\Case-211\Ex4\DCIM\IMG_0412.jpg

The three hashes of the questioned picture, printed so the values can be compared by hand.

recoveryantra phash hash E:\Sets\reference\ref_0001.jpg

The same for the reference picture.

recoveryantra phash match E:\Case-211\Ex4\DCIM\IMG_0412.jpg E:\Sets\agency-set.json

The candidate list, with distance, chance rate and cautions.

recoveryantra gallery --case F:\Case-211 --tag-asset ev_0412 --label "phash candidate 6 bits set A" --examiner R.Iyer

Record the candidate as a bookmark whose label states the distance and the set, and nothing more.

Options, and when to use them

--labelState the distance and the set, and nothing that characterises the picture.
--examinerThe name the bookmark is recorded under.

Best practice

  • Write a candidate as a candidate: the two pictures look alike at a stated distance, and the examiner confirmed or did not confirm it by eye
  • Report the chance rate for the size of the set that was searched
  • Report the pictures set aside and the pictures that would not decode, as well as the ones that matched
  • Do not describe a no-match as a picture being absent from the set

What this will not do

  • The chance figures were measured on stock photographs and 45 real pictures; an evidence set of another make-up may differ, and the output says so
  • Documents and screenshots are the worst case for this method and should never be reported on distance alone
  • A match is not a statement about content. The engine's own text is checked so that it never characterises what a picture shows

Hit one of these limits? The situation chooser names the product or the method that gets past each one, case by case.

A body-worn camera recording has to be taken in without being changed

SakshyaYantra EnterpriseFootage intake, decode and conversionIn the app

A body-worn camera recording and the files that came with it have been handed over. Before anything else is done with it, it has to be hashed, read and described in a way the other side can repeat: what the file is, what it declares about itself, what is missing from it, and which clock says what.

How to recognise it

  • A clip from a body-worn or in-car camera, with or without XML, JSON, CSV, GPX or checksum files beside it
  • The time and place on the clip will be relied on
  • Nobody has yet recorded its hash or checked that it is whole

Procedure

  1. Keep the recording and its companion files together, read onlyCompanion files are paired with the clip by file-name stem, by an explicit --sidecar, or by a manifest that names the clip or its SHA-256. A checksum file beside the clip is compared with the hash the tool computes.
  2. Run the ingestThe whole file is hashed (SHA-256, with MD5 and SHA-1 beside it), read through its own index, and hashed again at the end. If the size, the modified time or the hash changed while it was being read, the result says so.
  3. Read how it was recognisedThe verdict names the markers it rests on: a body-camera maker's name in the metadata, body-camera wording, or officer, badge and device identifiers together in one source. A file name is never enough.
  4. Read the three times as three thingsThe media clock is the length of the recording. The recorder clock is every time the file and its companions state, each kept as written, with its zone where one was written and never established as UTC. The case time is what the examiner supplies. They are never merged.
  5. Read the completeness statementComplete means every picture and sound the index declares is present. Anything else is reported with numbers, such as the first missing sample and the bytes absent, and nothing is padded or repaired. Complete is a structural statement: it does not decode the pictures.
  6. Write the report set into the case folderThe output folder receives the full result as JSON, three reports (executive, judicial and detailed) and a manifest that hashes each of them. The detailed report carries what is needed to re-derive the finding.
  7. Bring the recording into the caseFootage intake records the exhibit with the source hash and the examiner's typed name. It spends one use of the licence for the source, however many frames it holds. The command prints the case it opened or created, with its folder in brackets; give that folder, exactly as printed, to --case in every later command.

Commands

recoveryantra bodycam ingest E:\Exhibits\BW-0417\clip_0093.mp4 --out F:\Case-211\bodycam --examiner R.Iyer --case-id 211

Take in one recording and write the report set.

recoveryantra bodycam ingest E:\Exhibits\BW-0417 --recursive --json

A folder of recordings, folders below it included, with the structured result printed as JSON.

recoveryantra footage intake E:\Exhibits\BW-0417\clip_0093.mp4 --case F:\Case-211 --examiner R.Iyer

Put the exhibit in the case.

Options, and when to use them

--outA folder for the report set. Give it whenever the ingest will be relied on; without it the result is printed and nothing is saved.
--examinerRecorded in the report. Type your own name.
--recursiveWith a folder, also read the folders below it.
--jsonPrint the whole structured result, for a script or a second reader.

Best practice

  • Work from a copy, or read the exhibit through a write blocker; the ingest writes only into the report folder
  • Keep the companion files with the clip; each one read is an exhibit of its own
  • Keep the manifest with the three reports; it hashes each of them
  • Quote the result digest wherever the finding is relied on; the same bytes give the same digest

What this will not do

  • Recognition is by markers. The reader was proved on synthetic body-cam files and on 100 real recordings that were not body-cam footage, two of them GoPro. No maker's proprietary wrapper has been certified against a real body-cam recording
  • MP4, MOV, 3GP and Matroska or WebM are read by the tool's own readers. AVI, MPEG-TS and other containers get the hash, the probe and the companion files only, and the report says so
  • A clock burnt into the picture is not read by the ingest
  • The result is a set of observations. It says nothing about the recording's authenticity, the device's identity or anyone's conduct

Hit one of these limits? The situation chooser names the product or the method that gets past each one, case by case.

The place and the time on a body-worn camera recording will be relied on

SakshyaYantra EnterpriseFootage intake, decode and conversionIn the app

A recording is put forward as showing where a camera was and when. The examiner has to say what the file itself records about position and time, keep the three clocks apart, and show where the recorder's clock and the GPS clock agree or do not.

How to recognise it

  • A GoPro-class file with a telemetry track, or a clip with a GPX, NMEA or CSV track beside it
  • Someone will say the recording places the wearer at a location at a time
  • The recorder clock, the GPS clock and the file times are not obviously the same

Procedure

  1. Ingest with the case time the examiner can supportGive the case time as key=value pairs. It is stored exactly as supplied and is never merged with the recorder's clock.
  2. Read the GPS summary before the pointsThe summary gives the bounds and the time range. Rows with no satellite fix, and NMEA sentences that fail their checksum, are counted and reported, not used. A file that states no fix at all is reported as having no position.
  3. See which points are tied to media timeIn a GoPro-class telemetry track each point carries the media-time span of the sample that held it. Points from a companion file are unlinked to media time by design, and the result marks them so.
  4. Compare like with likeRecorder clock observations are compared only with observations of the same kind. A difference is reported as one grouped warning in which neither clock is taken as correct. The recorded start and stop are checked against the media duration, and the GPS clock against that window.
  5. Leave the time zone aloneA time written without a zone is never converted. Establishing UTC needs the examiner's corroboration, recorded separately.

Commands

recoveryantra bodycam ingest E:\Exhibits\BW-0417\GH010093.MP4 --case-time incident_call=2026-03-01T14:02 --out F:\Case-211\bodycam

Ingest with the time the examiner established for the call, kept beside the recorder's own clocks.

recoveryantra bodycam ingest E:\Exhibits\BW-0417\GH010093.MP4 --sidecar E:\Exhibits\BW-0417\GH010093.gpx --max-points 500 --json

Read a track file that name pairing would not find, and list the first 500 points; every summary figure still uses all of them.

Options, and when to use them

--case-timeKEY=VALUE, repeatable. For facts the examiner establishes, such as the time of a call. It is kept verbatim and separate.
--sidecarA companion file to read even when pairing by name would not find it. Repeatable.
--max-pointsHow many GPS points are listed in the result. Every summary figure still uses all of them.

Best practice

  • Give the case time in the words of its source, with its own uncertainty stated separately
  • Report the no-fix and failed-checksum counts beside the position count
  • Say which points are tied to media time and which are not
  • Compare positions with other evidence before relying on them

What this will not do

  • Position comes only from the forms the tool reads: ISO 6709 strings, 3GPP location boxes, NMEA, GPX, GoPro GPMF telemetry and latitude or longitude keys in JSON or CSV. GPS held in subtitle or text tracks and in other vendor boxes is not decoded, and KML is inventoried only
  • Nothing is interpolated, sorted or smoothed
  • A real GoPro HERO7 recording carried 204 GPS rows and no satellite lock; the result said no position was found rather than presenting the rows as places
  • The ingest reports what the file records. It does not say whether the record is correct

Hit one of these limits? The situation chooser names the product or the method that gets past each one, case by case.

A recording is not recognised as body-cam footage, or stops short of what its index declares

SakshyaYantra EnterpriseFootage intake, decode and conversionIn the app

A recording was handed over as body-worn camera footage but the ingest does not recognise it, or it is shorter than the index says it should be. The examiner has to record what was found, what was refused and why, and what is missing, without guessing at a make or padding a gap.

How to recognise it

  • The verdict starts with not recognised as body-cam footage
  • The completeness line reads truncated or no_index
  • A wrapper or box the tool has no specification for is listed as needing a sample

Procedure

  1. Read the refusal as a findingA recording with no markers inside it is not called body-cam footage. The verdict says how many fields were examined and what was looked for. A file name that carries a maker's name is a weak hint and is not enough.
  2. Record the source as an assertion when the examiner knows itIngest again with the assertion. It is written into the result as asserted by the examiner and not measured, and it cannot turn a file that is not a video into a clip.
  3. Read what is missing, in numbersA cut recording is reported as a state, such as no index or truncated, with the samples and bytes that are absent: a movie box that never arrived, or a media box that declares more bytes than the file holds. Nothing is padded or repaired. The report says whether picture and sound survived the cut.
  4. Read the wrapper inventoryA box or wrapper with no public specification is listed with its offset, size and SHA-256 and marked as needing a sample to certify. Keep the file; it is the sample a decoder would be written from.
  5. Use the salvage ladder if frames must be recoveredThe decode ladder tries the container, the index, the stream and then salvage, and records which rung produced each frame. Its output is a different exhibit from the original and is labelled as one.

Commands

recoveryantra bodycam ingest E:\Exhibits\BW-0421\clip_0007.mp4

A plain ingest: the verdict and the completeness state are printed.

recoveryantra bodycam ingest E:\Exhibits\BW-0421\clip_0007.mp4 --assert-bodycam --out F:\Case-211\bodycam --examiner R.Iyer

The same recording with the examiner's assertion recorded.

recoveryantra footage acquire E:\Exhibits\BW-0421\clip_0007.mp4 -o F:\Case-211\decoded --case F:\Case-211

Run the decode ladder on a copy when the frames themselves are needed.

Options, and when to use them

--assert-bodycamOnly when the examiner knows the source. It is recorded as an assertion and never as a measurement.
-oThe folder the decoded frames go to, on a different drive from the evidence.

Best practice

  • Report the refusal and its reason exactly as printed
  • Keep the original untouched and try salvage on a copy
  • Say which numbers came from the index and which from the bytes present
  • Keep an unrecognised wrapper; it is the sample a decoder would be written from

What this will not do

  • Not recognised is not the same as not a body-cam recording. It says only that no marker was found in the file or its companion files
  • Complete is a structural word: the index matches the bytes present. A recording with a zeroed region and an intact index is called complete, and the report says why the word is limited there
  • A fragmented recording that lost a fragment shows the gap in time and sequence. The missing footage cannot be rebuilt from what the file holds
  • A real QuickTime test file that had been cut short was reported as 33 of 708 samples present with 938,476 bytes missing, and it was not padded

Hit one of these limits? The situation chooser names the product or the method that gets past each one, case by case.

A reviewer needs to know where a name, number or phrase is written in the case, with proof

SakshyaYantra EnterpriseAsk the case (AI observations after a sealed reading)In the app

A case holds dozens of exhibits, notes, findings and reports. A reviewer, a lawyer or the next examiner asks where something is written down, and an answer that cannot be checked against the case will not be accepted. The case index returns the verbatim passages that answer the question, each with the exhibit and the exact place it came from.

How to recognise it

  • A question of the form who, where, when or which number, over a case with many exhibits
  • Reading every exhibit again would cost an afternoon and leave nothing to point at
  • The answer has to be checkable by someone who was not there

Procedure

  1. Build the index onceThe index reads every text exhibit, every finding and note, the report files and the recorder overlay text, in place. It is kept inside the case and reused while nothing in the case has changed; a locked, read-only case is indexed in memory and nothing is written into it. The output lists what was not searched, such as video, audio and archives, and why.
  2. Ask in the words the case would useUse the names, numbers and phrases the case would contain. A phone number written with spaces or a plus sign is found however it was typed, and a quoted phrase must appear as written. Matching is by word, not by meaning, so a question that says meet will not find a passage that says met.
  3. Read the passages, not a summaryEach passage is a verbatim slice of the source, with its exhibit, its kind and its place: a byte range and line numbers for a text file, or a character range inside a finding. A partial answer names the words it lacks.
  4. Read a not-found as a statement about what was searchedWhen nothing answers, the output says not found in this case and repeats what was and was not searched. Weaker candidates appear only as labelled weak leads and never as the answer.
  5. Narrow the search when the answer is noisyLimit it to evidence, findings, notes, reports, overlays or exhibit descriptors, or to one report tier, and say how many passages should come back.
  6. Keep the citation with the passageEvery passage carries a citation naming the exhibit, the place in it and the digest of the text. Put the passage and its citation into the report together.

Commands

recoveryantra caseqa index --case F:\Case-211

Build or refresh the index and list what was not searched.

recoveryantra caseqa ask "Who did Meera meet at Cafe Lotus" --case F:\Case-211

The verbatim passages that answer it, each with its exhibit and place, or not found in this case.

recoveryantra caseqa ask "vehicle MH12AB1234" --case F:\Case-211 --kind evidence --kind finding -k 8

Look only in evidence and findings and return up to eight passages. An exact identifier such as a plate is treated as decisive.

Options, and when to use them

--caseThe case folder. Name it every time: left out, the most recently opened case is used, which is a surprise on a shared workstation.
--kindevidence, finding, note, report, overlay or exhibit, and repeatable. Use it when one kind of source drowns the others.
-kHow many passages come back. The default is 5.

Best practice

  • Name the case folder on every command
  • Quote a passage together with its citation and never on its own
  • State what was not searched beside every not-found
  • Ask again after the case changes; the index is rebuilt whenever a source has changed

What this will not do

  • Only text is searched. Video and audio content, image pixels and speech are not, and a PDF is searched only through its printable strings. Not found means not found in the indexed text of this case
  • Matching is by words, with English stemming only. Other scripts are matched correctly but not stemmed, and Chinese, Japanese and Thai are not segmented
  • AI-generated observations already in the case are left out of the answers unless --include-ai-observations is given, and are labelled when they are used
  • Measured on synthetic English text, 16.7 MB (40,185 passages) took 6.6 seconds to index. A 500 MB text corpus would take a few minutes and about 2 GB of memory

Hit one of these limits? The situation chooser names the product or the method that gets past each one, case by case.

A local language model's summary is wanted, and it has to stay an observation

SakshyaYantra EnterpriseAsk the case (AI observations after a sealed reading)In the app

A reviewer wants a short summary of the passages that answer a question, from a language model running on the workstation. The summary may help the examiner read faster, and it has to stay what it is: an observation made after the examiner recorded their own reading, never a finding.

How to recognise it

  • AI is set to local mode and a model is on the workstation's own disk
  • A summary is wanted over the passages a question already returned
  • The agency or the court will ask what the model saw, what it said and what the examiner had already written

Procedure

  1. Ask without a model firstThe verbatim passages are the answer of record. Read them before anything else. AI is off by default: with no model named nothing is loaded, and the output says so.
  2. Write your own reading and seal itGive the reading and your name with the question, or mark it inconclusive. It is recorded in the case's hash-chained audit trail before the model is loaded. With no reading and no inconclusive mark, or no examiner name, the model is not run.
  3. Name the local modelThe model is a folder or file on the workstation's own disk. A network address or a missing path is refused, nothing is downloaded, a model folder's own Python code is never run and pickled weights are refused.
  4. Read the claims, supported and flaggedThe summary is split into claims. A claim that cites a passage that was not supplied refuses the whole answer. A cited claim whose numbers or identifiers are not in the cited text is flagged. The check is a heuristic: it catches wrong numbers and invented detail, and it does not prove a claim true.
  5. Keep it labelledThe output is headed AI OBSERVATION - NOT A FINDING and records the model, the prompt and the digest of every passage it was given. Nothing from it becomes a finding except by the examiner's own typed decision.

Commands

recoveryantra caseqa ask "What did the witness say about the sedan" --case F:\Case-211

The passages alone. No model is touched.

recoveryantra caseqa ask "What did the witness say about the sedan" --case F:\Case-211 --model D:\models\local-llm --reading "Statement places her at the cafe from 21:04; sedan detail unverified" --examiner R.Iyer

The same question with the reading sealed first and a local model named.

recoveryantra caseqa ask "What did the witness say about the sedan" --case F:\Case-211 --model D:\models\local-llm --inconclusive --examiner R.Iyer

When no reading can be formed yet, that is recorded instead.

Options, and when to use them

--modelA local model path, used only when AI is set to local. Leave it off and no model is touched.
--readingYour own reading of the case, sealed before the model is loaded.
--inconclusiveIn place of a reading, when you cannot yet form one. It is recorded as such.
--examinerYour name. The reading is sealed under it, and without it the model is not run.

Best practice

  • Record your own reading before you look at anything a model wrote
  • Report the model, its version and the digests of its files beside anything it contributed
  • Cite the passages and never the summary
  • Leave AI off where it has not been authorised

What this will not do

  • No model ships with the tool. A run that cannot happen is refused with a named reason (model unavailable, context too long, model failed) and the sealed reading stays sealed
  • A summary can be fluent and wrong. The grounding check is a heuristic and the verbatim passages remain the answer of record
  • If AI is set to cloud this command declines and says so. The cloud route belongs to the casequery command, with its own switch and transfer record
  • The command opens no network connection; a test that watches for any saw none across the index, the embedder and the model load

Hit one of these limits? The situation chooser names the product or the method that gets past each one, case by case.

A citation in a report has to be shown to still match the case

SakshyaYantra EnterpriseAsk the case (AI observations after a sealed reading)In the app

A report quotes passages from the case. Weeks later, before it is disclosed or when it is challenged, somebody has to show that each quoted passage is still exactly what the case holds: that the exhibit has not changed and that the text is the same.

How to recognise it

  • A report or a statement quotes passages with citations
  • The case has been worked on since the answer was given
  • The other side asks to see the source of each quotation

Procedure

  1. Keep the answer as it was givenSave the JSON that the ask command prints with --json, to a file. It carries the whole result, every citation included, and nothing else.
  2. Re-check against the live caseEach citation is re-derived from the case as it is now and compared with the digest recorded when the answer was given. The index is never trusted for this.
  3. Read the reason for any problemThe reasons are named: the record is missing, the source is missing, the exhibit no longer hashes to its recorded digest, the record has changed, the content has changed, or the citation is of a kind that cannot be re-checked.
  4. Treat a change as a finding about the caseAn exhibit that no longer matches its digest is a matter for the chain of custody, not a formatting problem. Find out why before the report is disclosed.
  5. File the result with the reportThe command prints how many citations resolve, and exits with a failure code when any does not, so it can gate a release step. Attach the line, with the date, to the report.

Commands

recoveryantra caseqa ask "Who did Meera meet at Cafe Lotus" --case F:\Case-211 --json

Print the whole result, citations included, as JSON to be saved to a file.

recoveryantra caseqa cite --case F:\Case-211 --citation F:\Case-211\answers\cafe-lotus.json

Re-check every citation in the saved answer against the case as it is now.

Options, and when to use them

--jsonPrint the whole structured answer. This is the file to keep if the citations are to be re-checked later.
--citationA JSON file holding one citation, a list of them, or a whole saved answer.

Best practice

  • Re-check every citation on the day a report is finalised and again on the day it is disclosed
  • Keep each saved answer with the report it supports
  • Look into a citation that does not resolve before anything else

What this will not do

  • A citation into derived text, such as an Office document, UTF-16 or HTML, is a character position and not a byte offset. It is re-derived and compared by digest, and it carries no byte range
  • The check shows that the text is the same as when it was cited. It does not show what the text means
  • It opens only paths it derives from the case's own records, and refuses a path that leaves the case folder

Hit one of these limits? The situation chooser names the product or the method that gets past each one, case by case.

4 scenarios

Sanitisation and disposal

Removing data on purpose, and being able to prove it was removed.

Certified erasure: standard, verification, certificate

Drives are leaving the organisation and must be provably erased

RecoverYantra WipeSecure erase and certificateIn the app

Storage is being retired, sold or returned on lease, and the organisation needs a record that each drive was cleared before it left.

How to recognise it

  • An asset disposal list
  • A policy requiring evidence of sanitisation
  • Drives that still work and hold live data

Procedure

  1. Confirm the drive is the one on the disposal listThe serial number has to be typed back before anything is erased.
  2. Sanitise to the standard, then verifyVerification is what the certificate's central claim rests on.
  3. Keep the certificate with the asset recordA certificate stored only on the erased machine is no record at all.

Commands

recoveryantra erase \\.\PhysicalDrive3 --confirm WD-WCC4N1234567 --out E:\Disposal --examiner "A Sharma"

Sanitise, verify with the recovery engine, and issue a signed certificate.

recoveryantra erase \\.\PhysicalDrive3 --confirm WD-WCC4N1234567 --firmware --out E:\Disposal --examiner "A Sharma"

Also issue the drive's own firmware sanitise to reach NIST Purge where the drive supports it.

Options, and when to use them

--confirmThe drive's own serial number. There is no override; this is the step that prevents erasing the wrong disk.
--passesLeave at 1. NIST SP 800-88 Rev. 1 (superseded by Rev. 2 in 2025) accepted one pass suffices on modern media.
--patternLeave at zero. A zeroed drive can be PROVEN clean; random fill cannot be distinguished from data that was encrypted.
--firmwareReaches Purge where the drive supports it, including remapped and spare blocks an overwrite cannot address.
--outThe records store, not the drive being erased.

Best practice

  • Match the serial number to the disposal list before typing it
  • Store certificates centrally, indexed by asset tag
  • Erase before the drive leaves your physical control, not after

What this will not do

  • No software reaches the standard's Destroy level; that requires physical destruction
  • On flash, the certificate records the level actually reached, which may be lower than requested where the controller does not expose the spare area

Hit one of these limits? The situation chooser names the product or the method that gets past each one, case by case.

Also covered by RecoverYantraSuite

A compliance policy requires certified sanitisation

RecoverYantra WipeSecure erase and certificateIn the app

An auditor or a contract requires that sanitisation be to a named standard and evidenced, not asserted.

How to recognise it

  • An audit or contractual requirement naming a standard
  • A need for per-device evidence
  • A defined retention period for the records

Procedure

  1. Establish which level the policy requiresClear and Purge are different levels with different methods.
  2. Sanitise to that level and verify with the recovery engineThe verification is the difference between a certificate and a claim.
  3. File the signed certificate against the assetThe signature is what makes the record checkable later.

Commands

recoveryantra erase \\.\PhysicalDrive4 --confirm S3Z2NB0K123456 --firmware --purge-method crypto --out E:\Compliance --examiner "A Sharma"

Sanitise using a named firmware method where policy specifies one.

recoveryantra audit E:\Compliance\audit_trail.jsonl

Verify that the disposal record has not been altered.

Options, and when to use them

--purge-methodForce a specific firmware method when the policy names one. Forcing a weaker method than the drive supports lowers the level reached, and the certificate will say so.
--examinerThe person accountable for the disposal under your policy.
--no-verifyOnly for bulk passes over drives that will be physically destroyed anyway. An unverified certificate must never be presented to an auditor as a verified one.
<path>Verify the disposal audit trail at the close of each batch.

Best practice

  • Record the level ACHIEVED, which is what the certificate states, not the level requested
  • Verify the audit trail for each batch
  • Keep certificates for the retention period the policy sets

What this will not do

  • The certificate states the level reached and its limits; it does not assert that recovery is impossible by any means
  • Destroy level requires physical destruction and no software provides it

Hit one of these limits? The situation chooser names the product or the method that gets past each one, case by case.

Also covered by RecoverYantraSuite

The drive is an SSD and an overwrite is not sufficient

RecoverYantra WipeSecure erase and certificateIn the app

Flash storage remaps blocks internally, so an overwrite issued by the host does not reach the spare and remapped areas. The controller has to do the work.

How to recognise it

  • The device is an SSD, NVMe or flash module
  • Policy requires Purge rather than Clear
  • The drive supports a firmware sanitise command

Procedure

  1. Establish what the drive itself supportsThe strongest method the drive advertises is used unless one is forced.
  2. Issue the firmware sanitiseThe controller clears areas an overwrite cannot address.
  3. Verify and read the certificate carefullyThe certificate records the level actually reached, which may be lower than requested.

Commands

recoveryantra erase \\.\PhysicalDrive5 --confirm 1234567890 --firmware --out E:\Disposal --examiner "A Sharma"

Firmware sanitise plus verification and certificate.

recoveryantra erase \\.\PhysicalDrive5 --confirm 1234567890 --firmware --purge-method block --out E:\Disposal --examiner "A Sharma"

Force a specific firmware method where the strongest is known to be unreliable on that model.

Options, and when to use them

--firmwareThe route to Purge on flash. Some drives make this non-interruptible once started.
--purge-methodForce a method only when policy names one or the advertised strongest is known unreliable on that model.
--patternStill zero. Random fill would make the verification weaker, not stronger.

Best practice

  • Do not interrupt a firmware sanitise once it has started
  • Read the certificate's stated level rather than assuming the request was met
  • Where the drive does not support a firmware sanitise, escalate to physical destruction rather than over-claiming

What this will not do

  • Where the controller does not expose the spare area, the certificate says the spare and remapped blocks are not guaranteed cleared
  • A drive that does not support firmware sanitise cannot reach Purge by overwriting

Hit one of these limits? The situation chooser names the product or the method that gets past each one, case by case.

Also covered by RecoverYantraSuite

The working folder holds a client's recovered data after the job

RecoverYantra WipeSecure erase and certificateIn the app

A completed recovery leaves the client's data on the bench. It should not stay there once the deliverable has been accepted.

How to recognise it

  • A completed and accepted job
  • Recovered data still in the working folder
  • A policy or contract on retention

Procedure

  1. Confirm the client has the deliverable and accepted itSanitising the working copy before acceptance removes your only second chance.
  2. Sanitise the working folderOne pass, and the stated limits are reported every time.
  3. Record the disposal against the jobThe record is what answers a later question about retention.

Commands

recoveryantra wipe E:\Jobs\4471\work

Sanitise the working folder, with confirmation.

recoveryantra wipe E:\Jobs\4471\work --yes

For scripted end-of-job cleanup where the folder is chosen by the script.

Options, and when to use them

--passesLeave at 1. As on erase, more passes cost time and add nothing measurable.
--yesScripted cleanup only. Removing the confirmation removes the last check that the right folder was named.
<folder>On flash, copy-on-write file systems and anything backed up, overwriting a folder does not guarantee every copy is gone.

Best practice

  • Sanitise only after the client has accepted the deliverable
  • Do not use the unattended form interactively
  • Record the date the working copy was disposed of

What this will not do

  • On flash and copy-on-write file systems, overwriting a folder does not reach every copy, and the limits are stated every time
  • Backups of the bench, if any, still hold the data

Hit one of these limits? The situation chooser names the product or the method that gets past each one, case by case.

Also covered by RecoverYantraSuite

3 scenarios

Cases that cross the boundaries

Work that does not fit one product, or changes character part way through.

Preparing rescue media for a machine that will not start

A job arrives and its type is not yet known

RecoverYantraSuiteRecover files from disks, cards and imagesIn the app

Work arrives before it can be classified. Committing to a route before the media has been examined is how a job ends up needing a tool that is not on the bench.

How to recognise it

  • A customer description that does not match a category cleanly
  • Media of unknown type or condition
  • A deadline that does not allow a second procurement

Procedure

  1. Triage the media before deciding anythingCondition and device class decide the route, and both are measured rather than assumed.
  2. Image anything that is failing, before classifying it furtherThe condition question outranks the category question.
  3. Then take the route the triage indicatesRecorder, phone, array and plain volume each go a different way.

Commands

recoveryantra list --triage

Condition, connection and device class for everything attached.

recoveryantra wizard --list

The guided procedures available in this build.

recoveryantra image --device \\.\PhysicalDrive2 -o E:\intake\ex1.dd --retries 1

Image first where the triage says the media is deteriorating.

recoveryantra recover --image E:\intake\ex1.dd -o E:\intake\Out --include-intact --report

Recover once the route is settled.

Options, and when to use them

--triageRun before touching anything. On an audibly failing drive keep even this brief and go straight to imaging.
--listShows the guided procedures this product carries.
--retriesLow while the condition is still uncertain.
--reportProduce one per exhibit from the start.

Best practice

  • Condition first, category second
  • Image anything uncertain before investigating it further
  • Record the intake state of every exhibit before work begins

What this will not do

  • Triage reads the drive. On a mechanically failing drive even that is a risk, and the answer is a cleanroom rather than more reads
  • A job that turns out to need a workspace this build lacks needs a different product, and the product will name it

Hit one of these limits? The situation chooser names the product or the method that gets past each one, case by case.

A commercial recovery turns into an investigation

SakshyaYantra EnterpriseForensic examination and reportingIn the app

Part way through a routine recovery something is found that changes the nature of the job. What has already been done determines whether the work remains usable.

How to recognise it

  • A finding that suggests deliberate deletion, fraud or misuse
  • A client who now wants the result to be defensible
  • Work already done in recovery mode

Procedure

  1. Stop and preserve the current stateDo not continue in recovery mode once the character of the job has changed.
  2. Switch to forensic mode before the next actionIt hashes every item and writes the custody manifest. A recovery-mode scan does not become evidential retrospectively.
  3. Record the point at which the change happenedBeing explicit about what was done under which mode is what keeps the earlier work usable.

Commands

recoveryantra mode forensic

Switch the bench before the next action.

recoveryantra recover --image E:\case.dd -o E:\Case\Out --profile forensic --include-intact --report

Re-run in the forensic profile so every item is hashed and the manifest is written.

recoveryantra audit E:\Case\Out\audit_trail.jsonl --manifest E:\Case\Out\recovery_manifest.json

Verify the trail before disclosure.

Options, and when to use them

<set>forensic. It changes real engine behaviour, not only the wording of the report, and must be set before the scan.
--profileOverride the saved mode for this run, which is the cleaner route on a bench normally used for commercial work.
--manifestRequired for evidential work: without it a trail cut short at the end still verifies.

Best practice

  • Switch mode before the next action, not at the end
  • Record exactly what was done before the switch and under what mode
  • Preserve the original image; re-running against it is what makes the earlier work recoverable

What this will not do

  • Work already completed in recovery mode was not hashed per file, and saying so plainly is better than implying otherwise
  • Only the Suite and Forensics carry the forensic workspace

Hit one of these limits? The situation chooser names the product or the method that gets past each one, case by case.

An encrypted volume is blocking the recovery

RecoverYantraSuiteRecover files from disks, cards and imagesIn the app

The volume is encrypted with BitLocker, LUKS, FileVault or VeraCrypt. Without the credential there is nothing to recover, and with it the job is ordinary.

How to recognise it

  • The volume shows as encrypted or unrecognised
  • A recovery key or passphrase may exist somewhere in the organisation
  • The data is needed

Procedure

  1. Find the credential before doing anything elseFor BitLocker this is frequently in Active Directory, a Microsoft account, or a printed recovery sheet.
  2. Unlock and recover in one step where the volume type supports itThe recovery runs against the decrypted view.
  3. For a container file, unlock it separatelyVeraCrypt and TrueCrypt containers are handled by their own command.

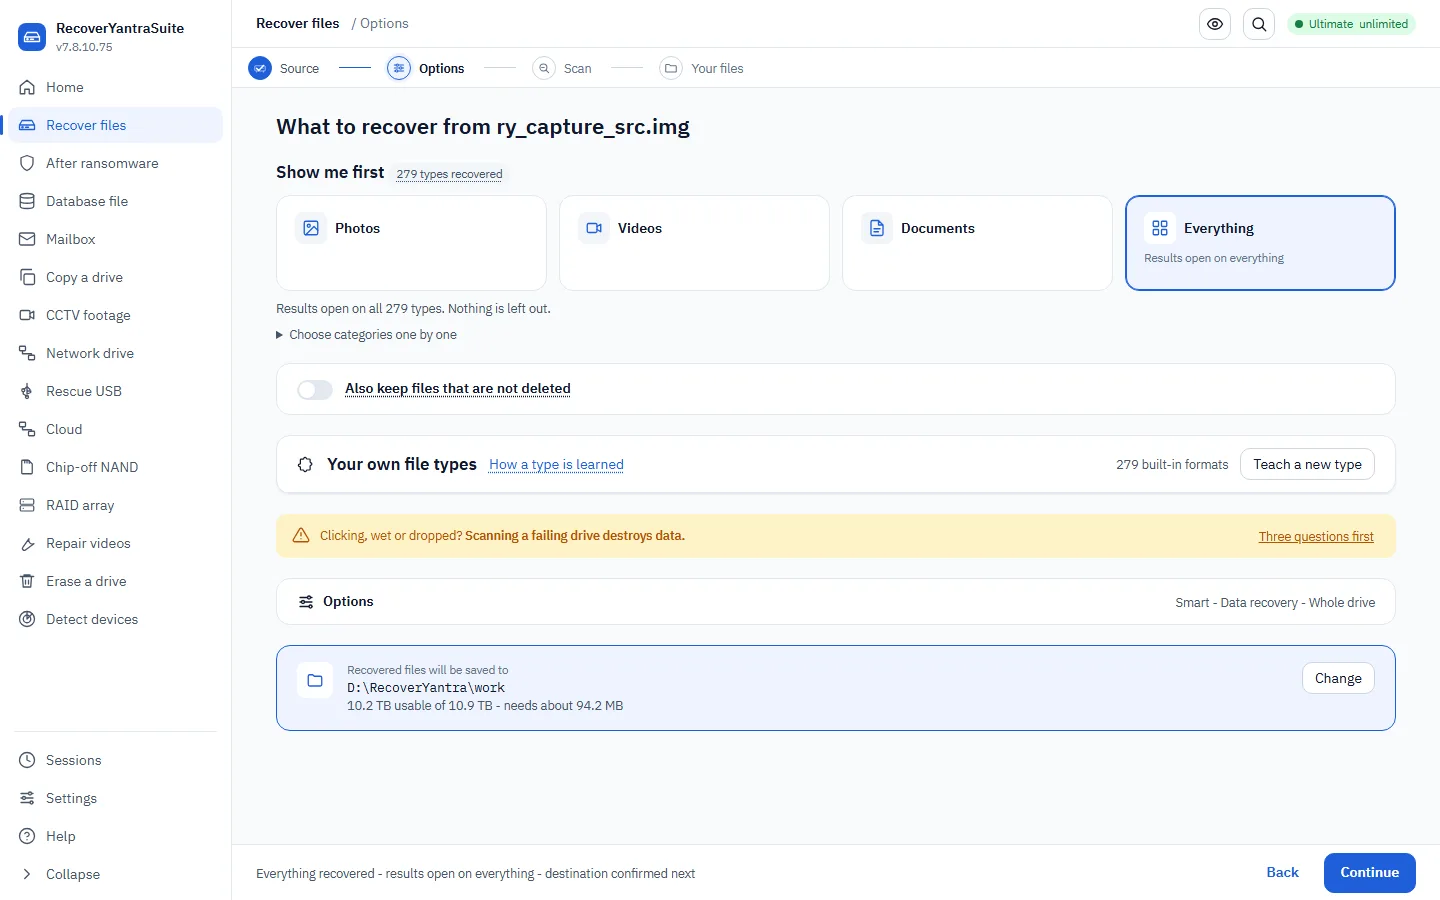
Commands

recoveryantra recover --device \\.\PhysicalDrive1 --password "123456-654321-..." -o E:\Out --include-intact

Unlock a BitLocker volume with its recovery password and recover.

recoveryantra veracrypt E:\container.hc --json E:\Out\unlock.json

Unlock a VeraCrypt container, prompting for the password rather than leaving it in shell history.

recoveryantra veracrypt E:\container.hc --truecrypt --hidden

A legacy TrueCrypt volume, or the hidden volume within one.

Options, and when to use them

--passwordWithout the correct credential the volume cannot be read by anyone. The credential is not retained for a later resume.
--pimSupply the Personal Iterations Multiplier if the volume was created with one; without it the correct password still fails.
--cipherRestricting to a known cipher cuts unlock time. Restricting to the wrong one makes a correct password look wrong.
--hiddenOnly where a hidden volume exists and you are authorised to access it.

Best practice

  • Exhaust the organisation's own key escrow before anything else
  • Omit the password on the command line so it is not left in shell history
  • Record which credential source was used

What this will not do

  • Where the key is genuinely unknown, no software recovers the contents, and the product says so rather than returning fragments
  • Camellia and Kuznyechik containers are identified but not decrypted

Hit one of these limits? The situation chooser names the product or the method that gets past each one, case by case.